| Author |
 Topic Topic  |
|
Stanley
Local Historian & Old Fart


36804 Posts

|
|
 Posted -
29/07/2011
:
06:27 Posted -
29/07/2011
:
06:27
|
New start as old topic was getting too big. Here's the LINK for the original topic.
Sheds are centres of honest endeavour and sanity, rare things these days. Please join in and tell us what you are doing in your shed. All are welcome!
[By the way, if I occasionally seem to be stating the bleeding obvious, it's because I'm aware of the fact that not everybody has the same experience so please forgive me.]
Stanley Challenger Graham

Barlick View
stanley at barnoldswick.freeserve.co.uk
|
|
| Replies |
| Author |
|
|
tripps
|
Posted - 15/08/2011 : 08:40
Nicely put - I agree
 |
Stanley
Local Historian & Old Fart
36804 Posts
|
|
Posted - 16/08/2011 : 07:38
If anything isn't clear, just ask, I'll be happy to help.
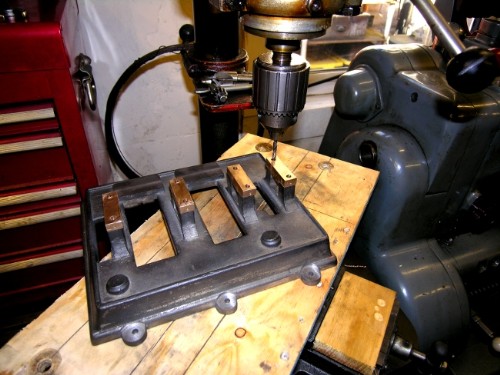
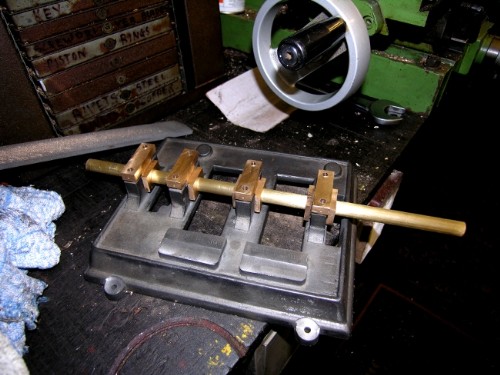
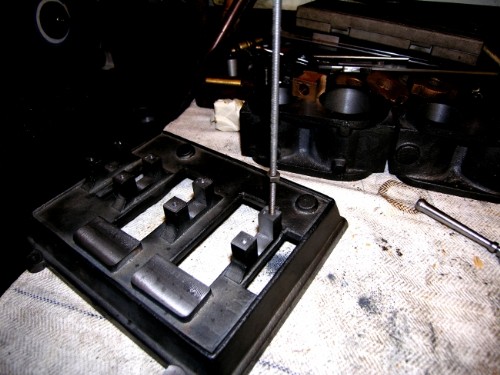
First job yesterday was to use the bearing caps as guides for starting the stud holes in the pedestals on the beds. Marking out is never dead accurate and using the mating caps for a guide makes sure that when the studs are in place the bearing cap is in its right place. I haven't drilled the stud holes completely because I shall go right through the casting and put a backing nut on the bottom. This is because I'm using threaded rod and not purpose made studs. An individual stud has an iterruption in the thread in the middle and when screwed in it will bind in the casting. Threaded rods haven't got this advantage so a backing nut is a good plan to lock them. Purists will shake their heads but I'm old and in a hurry!

Once all the stud holes in the pedestals were marked, the beds go to one side and I go in search of my main bearings. First job is to complete the conversion of my scrap cast bronze form Dick Bonser's foundry into correctly sized stock for making the bearing blanks.
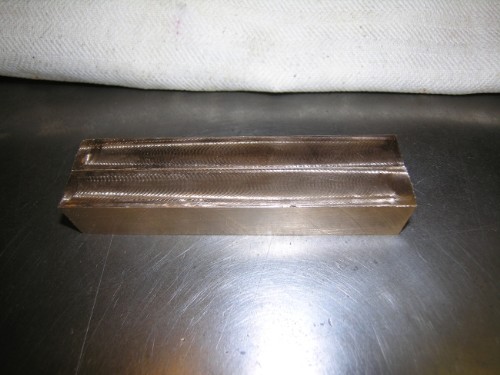
By close of play at noon I had two bars of cast bronze 1" X 3/4" ready for cutting into inch long blanks from which the bearings will be made. I think I enjoy this sort of work better than anything else in the shed. You start with what is in effect a piece of scrap and keep chipping away at it until you finish up with the shape and configuration you want. Ultimate recycling and control, try doing this by hand! In the old days, you'd make a pattern and get castings made somewhere near the correct shape and machine them. Today, the foundries are thin on the ground and if patterns are made commercially they cost a fortune. At one point I had to make a new main bearing shell for John Ingoe's traction engine and I just got Dick to cast me a big block of bronze and made it out of the solid just like these. Lots of cutting and swarf but the end result was just as good as the old way and a lot cheaper. Today is going to be chasing the blocks, marking out and some setting up ready for machining.
Stanley Challenger Graham
Barlick View
stanley at barnoldswick.freeserve.co.uk |
Stanley
Local Historian & Old Fart
36804 Posts
|
|
Posted - 16/08/2011 : 13:14
I've taken too many pics this morning so I'd better post before I forget the order! By the way, I had mail this morning from a loung lady who is starting her own shed and thanking me for going into so much detail, she's practcing doing what I am doing and says it is very helpful so I may do a bit more 'bleeding obvious'! For those who don't need it, bear with me.
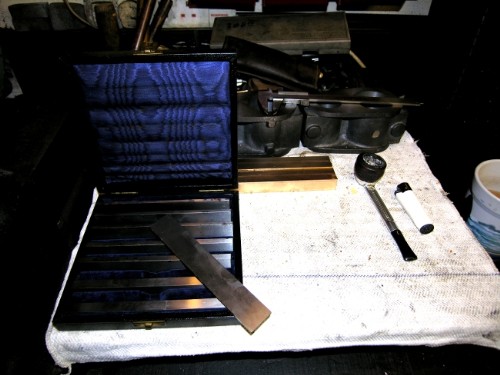
First pic is another example of grab interesting things when you see them, they always come in handy. I picked this box of Roebuck parallels up for nowt because they had a few rust spots on them. They are in pairs and are all ground accurate and parallel and marked with their size. I need to find 1" accurately this morning so I'm using the 1" x 1/8" parallel.

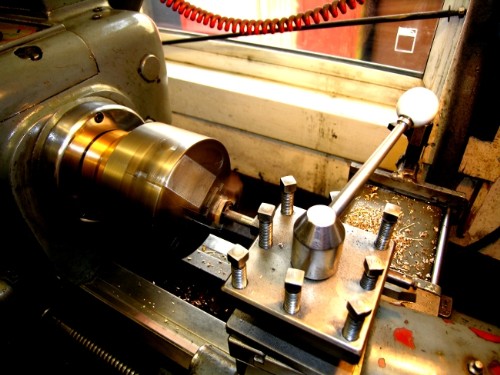
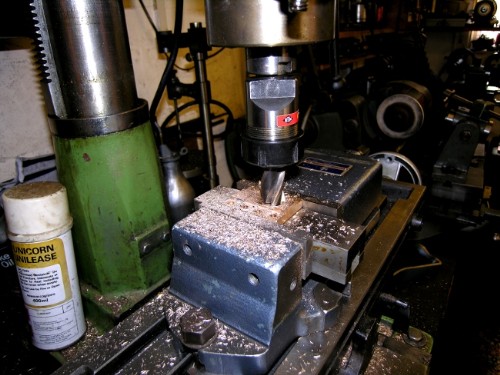
First job was to set the machine vice up on the horizontal mill ready for sawing the blanks for the bearings. It needs to be set so the jaws are at a true right angle to the saw and the quickest and easiest way to do this is mount your biggest accurate square in the jaws and sight it along the channels in the bed. I'm lucky to have this big engineer's square made by one of Newton's uncles who emigrated to the US. It's beautifully and accurately made and has an ornate signature engraved on it, J A Wilkinson. I have a pair of dividers he made as well on the same scale, lovely work and also signed.
Here's the inch parallel being used to set the saw cut. Hold it flat to the saw blade and adjust the bed till the backj edge of the parallel is dead level with the end of the bar. You know then that the cut will be 1"
And off we go, auto feed gives you a rest and the cuts don't take long.
By 10am we have our blocks, all cut to size and ready for marking out. Note the flat file lay on the surface plate. Easiest way to ensure you file dead flat is to lay the file down and rub the blocks on the file to get the rough edges from the saw cut off them. I've heard all these wonderful stories about people who can file an inch cube accurately but to be honest I don't know whether to believe them. I certainly can't do it! So cheat, lay the file flat and rub the blocks on it, it works just as well and dead easy to keep the piece flat.
Here are the blocks, five off one bar and four off the other. Ive marked them so I can keep the blocks separate, one set off one bar for one engine and the other set for the other. My reason for this is that whilst the blocks are reasonably accurate the two sets will be slightly different and any discrepancies will be OK if they are kept together with their mates. I'm ready now for marking the centres of the bores but first.....
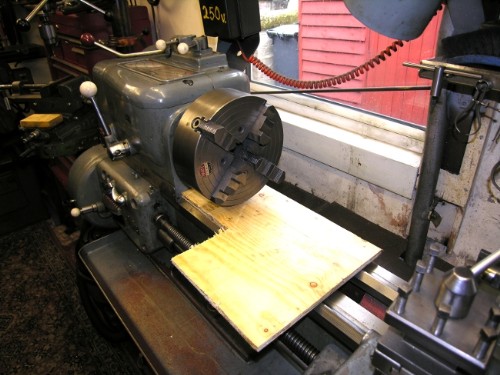
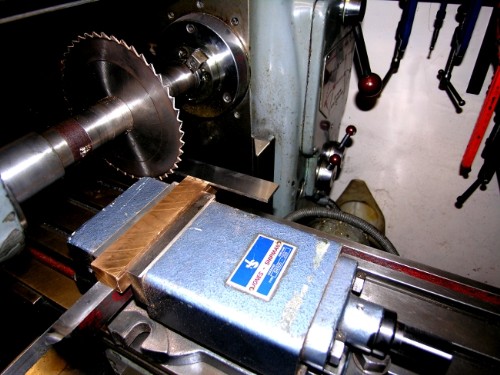
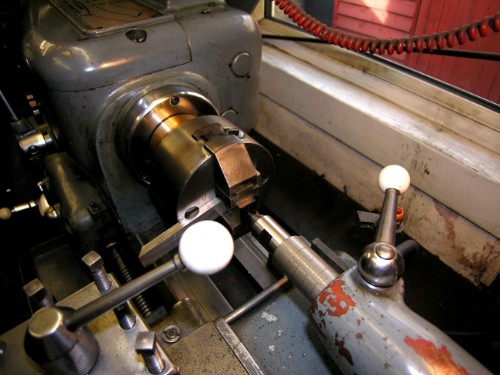
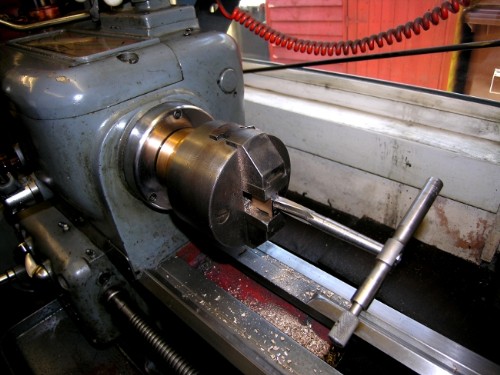
We need the big four jaw off the Harrison lathe and a different chuck for boring the bearings. The reason I did this pic was to remind the beginners that the easiest way to bruise a lathe bed is to drop a heavy chuck on it as it comes off the thread on the nose of the lathe. Put a piece of plywood on the bed. Takes only a second and saves any damage.
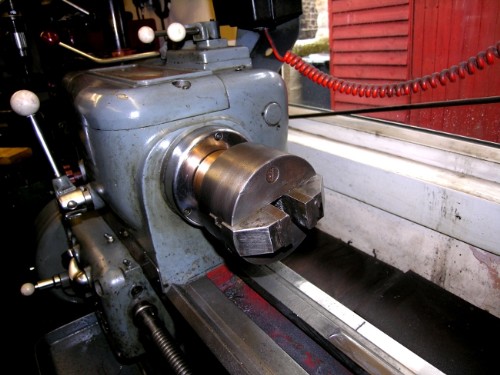
Here's a rare little beast for you. When I bought Johnny's big OT lathe I found there were some good chucks with it. I left all of them except this Cushman Two Jaw self centering chuck. You don't see many of them about and so I made a new back plate for it to fit the Harrison because that's where it gets used. (I kept the back that fits Johnny's lathe so it could soon be swapped if necessary) The chuck is brilliant for holding anything that has two parallel sides but isn't square. For instance a small piece of plate. This is ideal for the bearing blanks.
So, we're ready now for some centre finding and marking out.
Stanley Challenger Graham
Barlick View
stanley at barnoldswick.freeserve.co.uk |
Stanley
Local Historian & Old Fart
36804 Posts
|
|
Posted - 17/08/2011 : 06:19
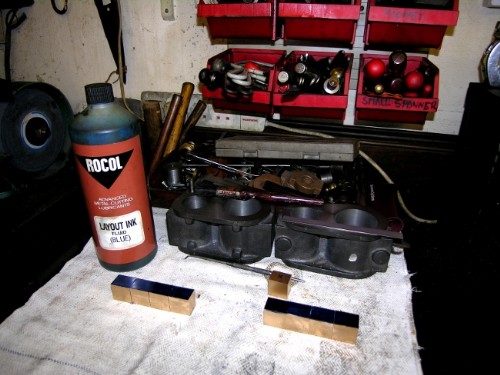
Popped in last night to blue the blanks so they mark clearly. Two sorts of layout ink, blue for clean shiny surfaces and white for rough castings. Helps to make marking out lines clearer.
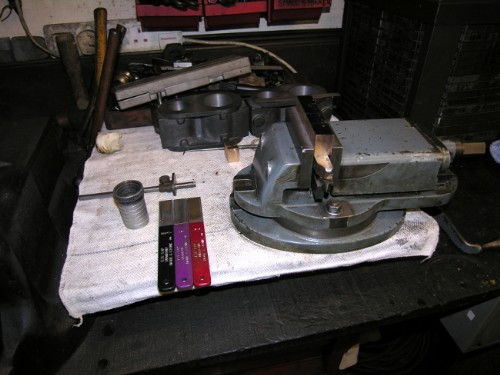
Ready for some serious centre marking. This is a different machine vice, handy for lots of jobs because it incorporates a turntable. I'm using it for marking because it holds the pieces more accurately. Note the little gauge behind the magnifying glass. Stanley Tools are best known for their woodworking tackle but they made tools for metal as well. This little scribing gauge is handy for marking anything with a straight edge. It has a small hardened bit made out of a piece of hacksaw blade which is simply cripped in a slit in the end. It was a bit blunt and needed sharpening so I used the diamond hones in the foreground. These are very cheap amd come in three grades, fine, medium and coarse. They are ideal for small sharpening jobs on very hard cutters. You can touch up carbide tipped tools with them, saves a lot of green grit wheel dust flying about. One last tip, notice that I've used high speed lathe cutters for packing the blanks up level in the vice. HS bits are parallel ground and you can trust them for jobs like this.
Ready for marking the centres when Jack and I have had a walk! Then we can get back to my favourite job, a bit of lathe work.
Stanley Challenger Graham
Barlick View
stanley at barnoldswick.freeserve.co.uk |
Invernahaille
|
Posted - 17/08/2011 : 23:05
Youve got some really nice tools there Stanley.
|
Stanley
Local Historian & Old Fart
36804 Posts
|
|
Posted - 18/08/2011 : 06:36
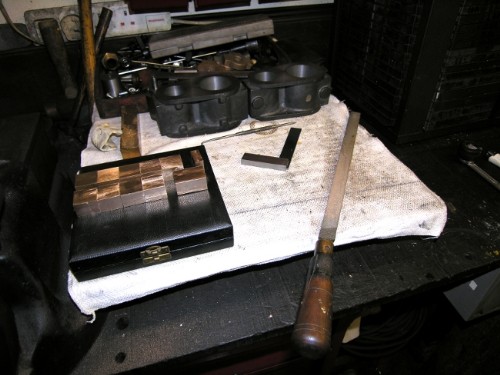
Years of grabbing anything interesting that I saw Robert. That's why any long-standing workshop is unique. I have tools I still don't understand properly! Here's an example of not letting anything slip the net!
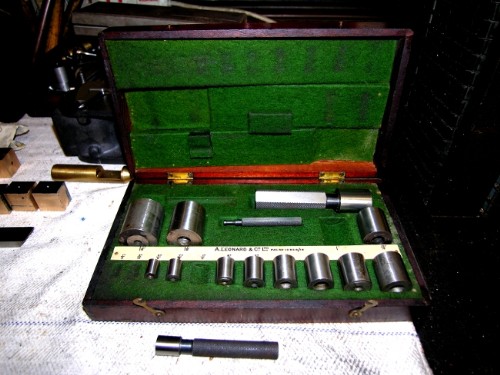
This is a set of standard gauges 3/8" to 1 1/2" in a mahogany box. Spotted in a pile of rubbish in a mill that was under demolition. £1 changed hands. Always keep your eyes open!
Setting the blank up in the two jaw for boring. A piece of HS steel as backing to ensure it's flat and true. Wind the centre forward to coincide with the centre you've marked and nip the chuck up. Ready for shaving!
Let boring commence. Sequence is first pop a Slocombe centre drill into the blank because they are short drill accurately and give a true centre for the drill. Then pop a 3/16" drill through as a pilot, followed by a 7/16" drill to take the meat out. Then bore to size checking with the 1/2" standard gauge. Once you have it right, set the micrometer dial on the cross-slide to zero so you can bore to the same size with one pass for the others even though you have woumd the cutter out of the way for setting up and drilling. This is one of the advantages of making more than one engine at a time.
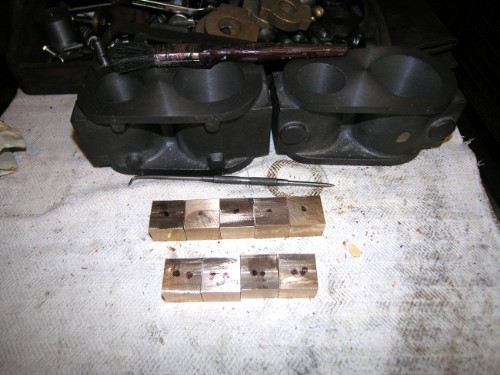
Close of play at noon. All the blanks bored and mounted on a piece of 1/2" brass bar. I don't know whether you can see the marks but I have kept the two sets separate becuse there will be small variations between the two and the next job is to mill the blocks so they fit into the pedestals with a lcating edge at each side. This will become clearer shortly.
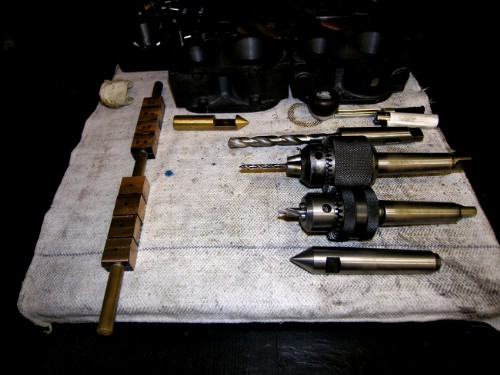
Notice the tools on the right, centre, centre drill, 3/16" drill and 7/16" drill. All mounted ready for use. You can't have too many 3 jaw chucks mounted on Morse taper shanks for the lathe tailstock. If you only have one get a 0-3/4", best quality you can afford. One tip for the new starters. Grind a flat on the leading edge of the cutting surfaces of the big drill. If it is raked for drilling steel it will grab as you start cutting. Cure is to sharpen it like a brass cutter, with neutral or even slightly negative rake. That way it won't try to wind itself into the cut and spoil the job. This also make certain that when you're starting tp drill the first edge to catch the work doen't grab and throw the drill off centre. I sharpen my drills by hand and very seldom get the lands perfectly equal and so I have to be careful with brass.
Last job was to tidy up, all tools put away, latthe bed cleaned and the clean brass swarf put in the bin with the rest of the brass scrap. Time I weighed it in, there is almost half a dustbin full! Today I shall machine the bearings to fit in the pedestals, adjust the potrusion of the mating face on the bearing caps and think about stud fitting. And in case you're wondering, the bores are all a strong 1/2", I'm not driving a 3,000 ton tramp steamer and a bit of play will be no detriment! I used to get everything as tight as I could and always ended up having to run the engines in before they loosened up. Theoretically this is the best way but I'm old and in a hurry!
Stanley Challenger Graham
Barlick View
stanley at barnoldswick.freeserve.co.uk |
Invernahaille
|
Posted - 19/08/2011 : 02:56
Stanley,
The availability of artizans tools is just an indicator of how industry as been de-skilled. I paticularly liked the phrase you used about not knowing what some of the tools you have accumulated are. I bet there are a few people who read this thread who have the same problem, and yet twenty-thirty years ago most people would have recognised them.
The old story Stanley, people dont want to pay for quality items any more. They much prefer to shop at the dollar store, very little built to last anymore.
I lay you odds on your steam engine will be around for a long long time. Thanks for taking the time to build it. It should be a legacy for future generations to appreciate the skills involved.
|
Stanley
Local Historian & Old Fart
36804 Posts
|
|
Posted - 19/08/2011 : 07:17
Thanks for that Robert and yes, you're quite right, the last forty years have been a good time to pick good tools up for nowt. I can remember being amazed at how cheap good stuff was. I saw a 36" swing Dean Smith and Grace lathe, one of the best makes ever, sold for less than the price of a new Myford Super 7. A friend of mine got a similar but smaller lathe for scrap price.
I remember seeing one tool that intrigued me and buying it for a few pence. I found it by chance in an old ME, it was a holder for guiding different gauges of wire when winding radio coils. I love little puzzles like that!
Stanley Challenger Graham
Barlick View
stanley at barnoldswick.freeserve.co.uk |
Stanley
Local Historian & Old Fart
36804 Posts
|
|
Posted - 19/08/2011 : 07:51
Nobody loves a smart arse! Here's an example which proves I have feet of clay.
Into the shed yesterday morning, all set up and raring to go. Last minute checks and on with cutting the shoulders out on the bearings so they would fit into the bed. Splendid!
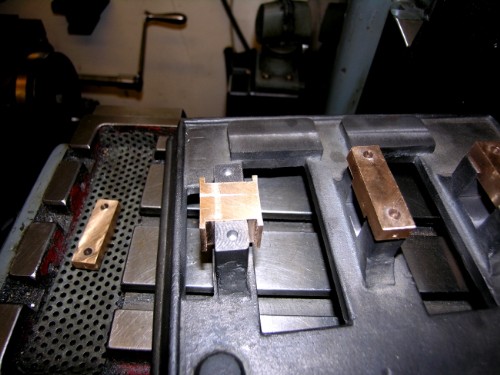
Popped the bearing in the pedestal and oh dear! It wasn't 3/4", it should have been 1/2". Oh Bugger! However, when you do something like this, and believe me you will, just pick yourself up, dust yourself down and start all over again!
Remember me cutting one extra blank? Marked it up, banged it in the two jaw, bored another blank and machined it out for 9/16" to give a bit of latitude. Here it is in the bed. On with the rest of the eight blanks. By the way, if you look carefully you'll see they are all numbered 1-8 to mate them with their correct housing because despite all my efforts there will be a touch of hand fitting to get a perfect fit.
Once they were all milled and seated, I popped a 1/2" reamer through to ensure they were the right size. Remember I bored them a bit strong? They were all slightly too small because during machining the castings distort slightly as the stresses come out.
Once they are all reamed, pop them into their mating pedestals and pop the reamer through again to make sure they are in line. A bit of hand-filing at this point to make sure they are all sitting dead level. Remember the bed castings can distort slightly as well at this point. You can never get castings dead accurate.
The last check, the 1/2" brass bar slides right through all the bores, they are in line and you can turn it with your fingers. Today's task is to treat the other bed the same.

At this point it becomes obvious that you're getting somewhere and from here on I like to keep work in progress in the kitchen on the work top. To me it is the best sort of ornament and reassures me that I'm making progress. Besides, it gets them out of harm's way in the shed! I shall end up today with two beds on the bench and will now think about getting the caps to a better fit, drilling the beds, tapping the holes and making the studs. Then I need to cut some nuts down to half nuts for locking nuts. Oh, and at some point vandalise the bearings by cutting them in half. Must have a look and see if I have any stock bar big enough for the cranshafts. I have an idea that's my next move, that way I can have the bottom end completed and ready for the upper parts.
Stanley Challenger Graham
Barlick View
stanley at barnoldswick.freeserve.co.uk |
Invernahaille
|
Posted - 19/08/2011 : 12:12
Stanley I did a scraping course for a month at DSG many many moons ago.
Bedding in turret slides and traverses. All done manually. What a skill to learn. Do you have any scrapers?
It would put a nice finish to your crankshafts and con rods.
|
Stanley
Local Historian & Old Fart
36804 Posts
|
|
Posted - 20/08/2011 : 06:13
Yes Robert, a full set but I very seldom use them. I used them mainly on full sized bearings on the engines I worked on. DSG were a wonderful firm and should never have gone under. I think an American firm bought the rump of the company and the designs. They were triggered mainly by DSG bringing out a design of a lathe with a concrete bed but I never heard any more of it. Some of the management took the buildings over and survived for a while reconditioning lathes but soon went down. Great shame, lovely machines, it could have been the expense of the quality that did them in.
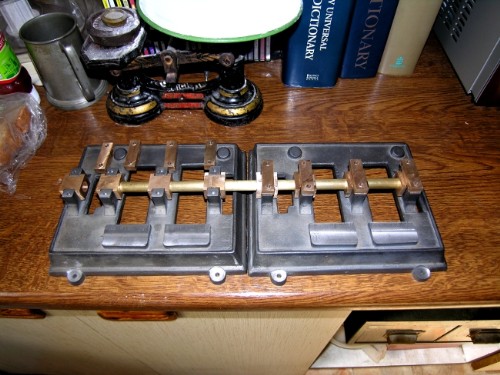
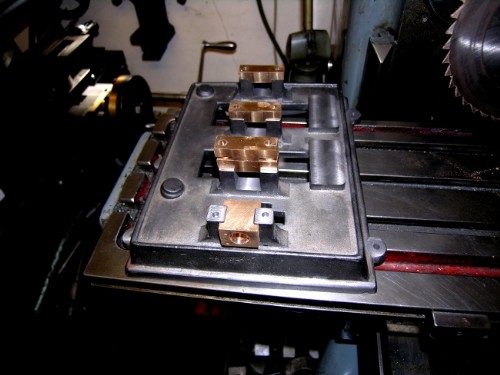
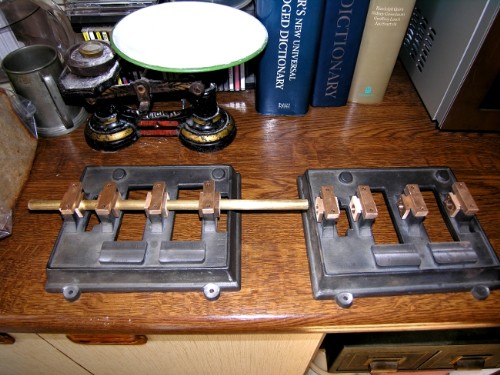
The beds at close of play last night. I popped the bar through both beds side by side to show how machining two sets together has kept the levels of both as near dead accurate as makes no difference.
Stanley Challenger Graham
Barlick View
stanley at barnoldswick.freeserve.co.uk |
Stanley
Local Historian & Old Fart
36804 Posts
|
|
Posted - 20/08/2011 : 06:40
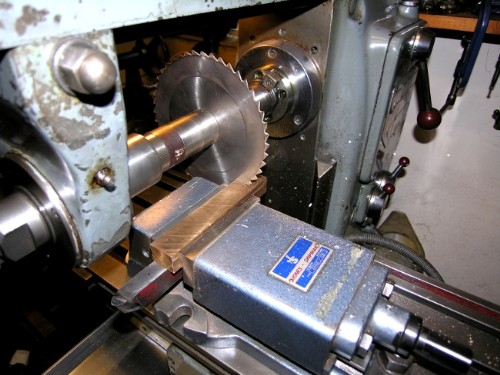
Robert, I was thinking about finish and I have to admit that I am not a good man on finish! I'm satisfied as long as they go like hell when you put steam or air on them! My mind wandered to todays tasks. There is going to be a lot of drilling and tapping for the pedestal studs, fitting bearing caps, drilling oil holes and the ultimate sacrilege as far as the purists are concerened, sawing the bearings in two! That got me to thiunking again, so here's a funny pic for you.
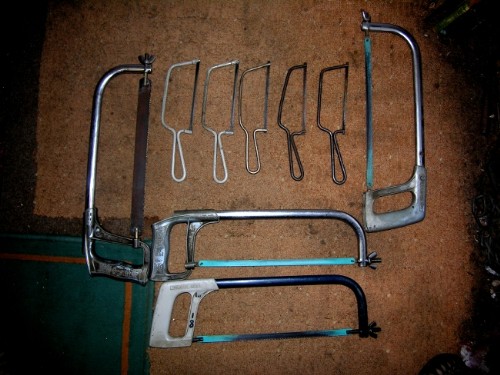
A bloke once asked me why I had so many hacksaws. I had to explain to him that they all had different grades of blade at different stages of wear. 18teeth per inch and 24tpi in the big frames. All Hard HS steel and the newest ones are for brass. No joy cutting brass with old blades because it just lubricates them and they don't cut clean. Always one frame with a machine blade in it for really rough cutting.
I just looked at the price of Eclipse all hard blades. The machine blades are £7 each and the hand blades £2.27 each. Years ago I bought a job lot of blades and have enough to last me till I die! I am a wealthy man! I must have £500 in blades in the drawer and I doubt if I paid more than a tenner. How times change....
Stanley Challenger Graham
Barlick View
stanley at barnoldswick.freeserve.co.uk |
Stanley
Local Historian & Old Fart
36804 Posts
|
|
Posted - 20/08/2011 : 16:08
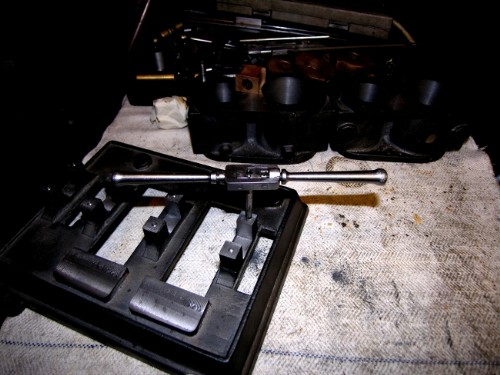
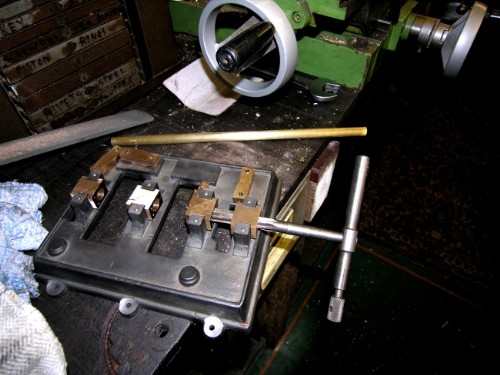
Next job is drilling and tapping stud holes in pedestals. I know you know that you have the right tapping drill size, the right tap and the right threaded rod/studs but no harm drilling one hole, tapping it and trying the stud. Once you're sure you have it right, on you go, only 15 left to do!
The rod in the hole. Found that drilling right through wasn't an option because of webs under the bed so backing nuts go out the window and shaft lock grade Loctite glue instead. Caution applies to tapping as well, go steady, taps are very brittle, even more so than drills. There's no rush, don't force the cut.
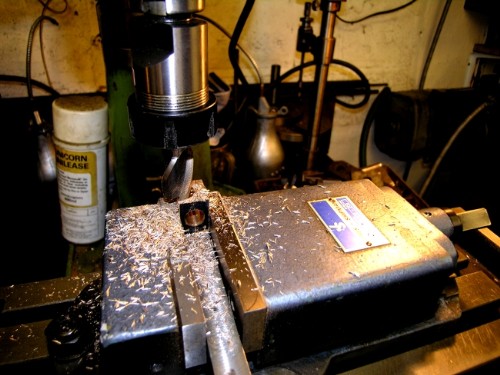
Get set up, sharpen drill and get going. Starter holes are already in place so easy to do but watch out as drill is breaking through with one land into a web. Very easy to have a grab and break the drill in the hole, we don't want that, they are almost impossible to get out without damaging the casting.
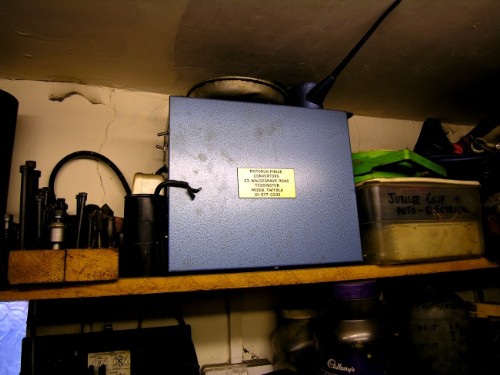
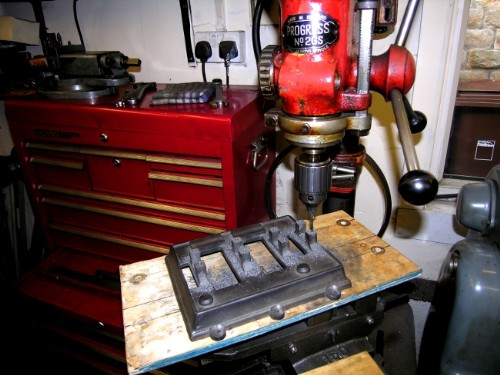
You can buy an old Progress pillar drill for no money at all and they are just the thing, don't take up a lot of room and even when worn still do a good job. The really cheap ones have three phase motors and if you are going to have a few old machines it pays to buy a Motorun Phase Converter. Single phase to three phase with no problems at all. I have several machines running off this box and it has never given a noment's trouble. You can save the cost in just one machine like a tool room lathe. By the way, in case you're wondering the tool chests aren't the expensive Snap-On make but an El Cheapo version 'Stack-On'. One third the price and well made.
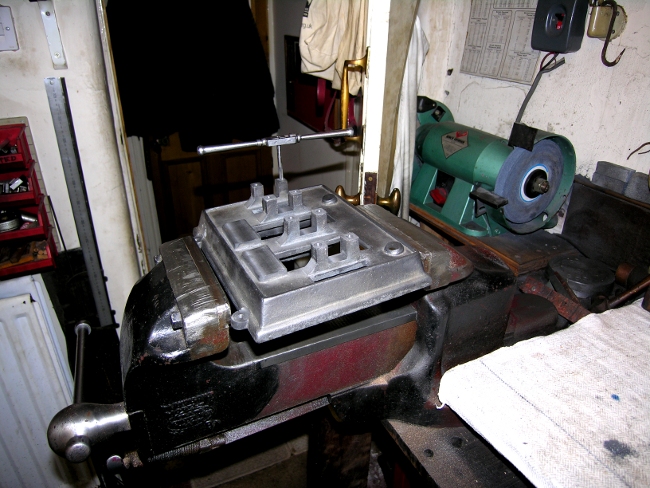
Beds held in the vise for tapping. If you're going to buy a vise get the biggest and best you can afford. This old Parkinson 'Perfect' Vise has 6" jaws and will hold up to 9". Made in Oldham they can still be found secondhand and are just about the best ever made. Worn jaws are no problem, you can easily make new ones. Graham Riley, my MSC manager at Ellenroad had his own engineering firm at one time. They once had a Parkinson vise with a fault so he took it back to the works in Oldham. Old Mr Parkinson took him into the shop and found him a vise to replace it. Graham said that what impressed him was that he had a ruler pocket in the leg of his immaculate three piece business suit!
Once all the stud holes are dealt with, a quick trip to the Clarkson Tool and Cutter Grinder, touch up the 3/4" cutter and then mill the bearing caps to finished size. Once milled all the edges broken with a smoothe file and a polish put on all the faces of the bearings and caps by rubbing on a piece of fine emery paper on the bench.
Close of play. All bearings and caps seated properly and finished. Ready for the studs, and the oil holes in the caps and the bearings. Then I'll saw the bearings in two and get serious about crankshafts!
Stanley Challenger Graham
Barlick View
stanley at barnoldswick.freeserve.co.uk |
Invernahaille
|
Posted - 20/08/2011 : 19:58
Stanley,
I had to go back a page to look at your plan. For a minute I thought you were going to put eccentric bearings in instead of cranks. I dont know why I thought that. It must be old age creeping up.
|
Stanley
Local Historian & Old Fart
36804 Posts
|
|
Posted - 21/08/2011 : 06:17
It's not the best of drawings Robert, bit like his detail drawings, many key measurements left out in them. The eccentrics are for the valves. The shaft is dead simple, 1/2" diameter right through and two cranks at 90degrees. The stroke is 2" so the throw is 1" to crank centres plus 1/2" , 3" diameter total for the stock needed and 10" long. I shall have to have a root in the steel stock to see if I have any lumps that will do. If not I shall have to ring Terry at Gissings and get him to help me out. Either that or twist John Ingoe's arm at Rochdale. Time he visited me anyway! I have a vague idea I have some stainless steel stock, that wouldn't be a bad idea, must get on my knees and have a good furtle. No problem if I'm held up, plenty to do on the cylinders etc that I can be getting on with. However, it would be nice to have the beds sat there with the CS installed. Makes you realise you are getting somewhere!
A story about Johnny making a shaft exactly like this. As most of you will know, it has to be turned on three centres, one for shaft centre and two others at crankpin centres. One of Johnny's mates was watching him finishing the shaft in his shed at Federation Street and commented that he was puzzled, Johnny had turned both cranks on the same centre. Johnny said that he had an answer for that. He heated the shaft centre up and twisted the shaft to make the cranks 90 degrees and then cleaned up the centre where he had heated it. "It isn't driving 300 looms Lad. That'll do!" Typical Johnny! I haven't enough confidence to do that! I'll do it the old-fashioned way.
One thing that Newton taught me was that it was quicker to mill the meat out of the webs of the cranks than do it in the lathe. Since he told me that I have always done it, far quicker and cuts down on interrupted cuts which I hate!
Stanley Challenger Graham
Barlick View
stanley at barnoldswick.freeserve.co.uk |
|
|
|
|