| Author |
 Topic Topic  |
|
Stanley
Local Historian & Old Fart


36804 Posts

|
|
 Posted -
25/11/2004
:
14:20 Posted -
25/11/2004
:
14:20
|
I've always been fascinated by the things people do in their spare time when they can do exactly what they want to do. Men and sheds are a particularly fertile field. Women tend to do their thing in the comfort of the house.
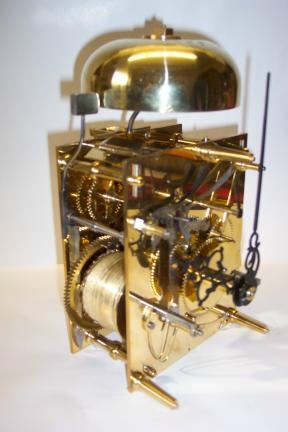
I was delighted to see Andy's picture of the clock movement he has made.
It struck me that we could perhaps start a new topic devoted to spare time skill. So Andy starts it off and my contribution is this:
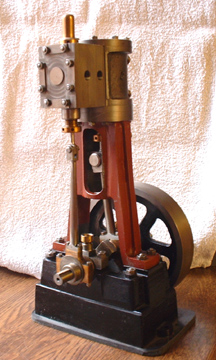
It's a small steam engine made from scratch and is based on the Stuart 5A but a longer stroke. One of these will drive a 14 foot boat with steam at 250psi. By the way, we don't like to call them models, it's exactly the same construction and materials as a full size engine, just smaller. So come on out there, let's hear about what you make in your spare time. I reckon we could be in for some surprises!
Stanley Challenger Graham

Barlick View
stanley at barnoldswick.freeserve.co.uk
|
|
| Replies |
| Author |
|
|
Stanley
Local Historian & Old Fart
36804 Posts
|
|
Posted - 04/10/2007 : 18:02
It's been a good day. Funny thing this engine building.... You start with a lump of metal chew some bits off it and throw most of it away and then when you've got over all the hurdles to get the shape right you have to start making it into a piece of Gorgonzola cheese!
First job on all the cylinders was to bore a half inch hole (well, 29/64") for the exhaust. Funny thing about this, apart from my natural fear of making a mistake, is that I checked before I started which side I wanted the exhaust on and satisfied myself I had it right. Actually, a mistake would be no big problem but I had it in my mind where I wanted them. Problem was that on engine no 3 I got it wrong three times before I realised that the problem was I'd stamped the number of the cylinder on both ends! Silly little thing but it cost me half an hour.
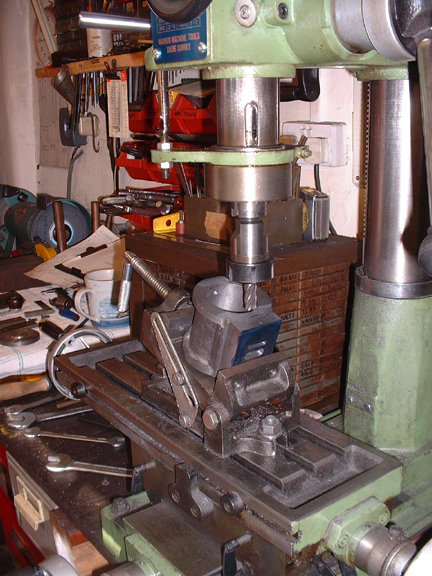
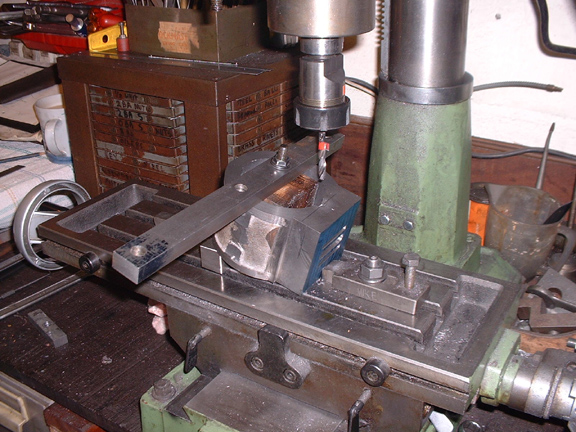
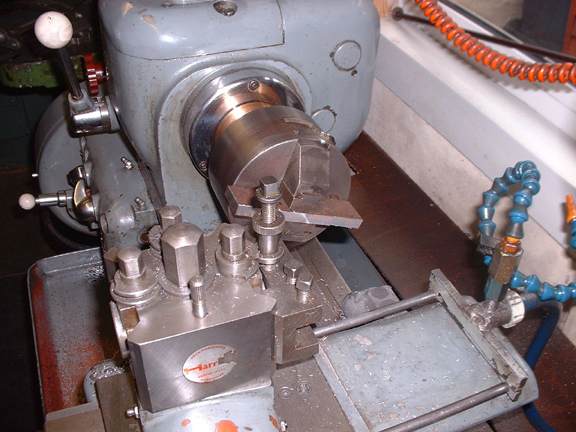
Once the exhsuts were done it was the steam passages, a more complicated matter. I decided on a 1/4" bore passage for all the HP cylinders and this handy little vice got one of it's infrequent trips out. I had to take the fases out of the jaws and mill one or two surfaces perfectly flat to get the cylinders in but well worth the effort because once it was set up, all the bores fell into place.
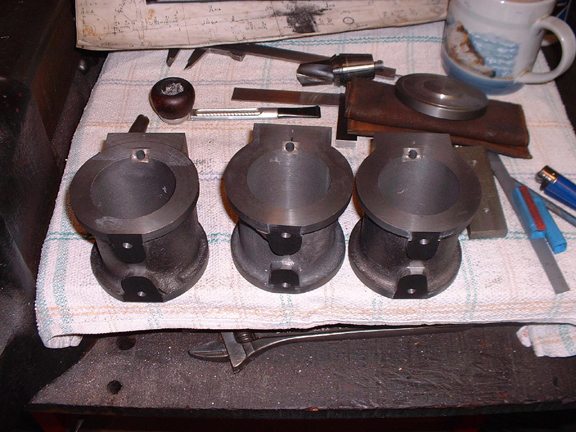
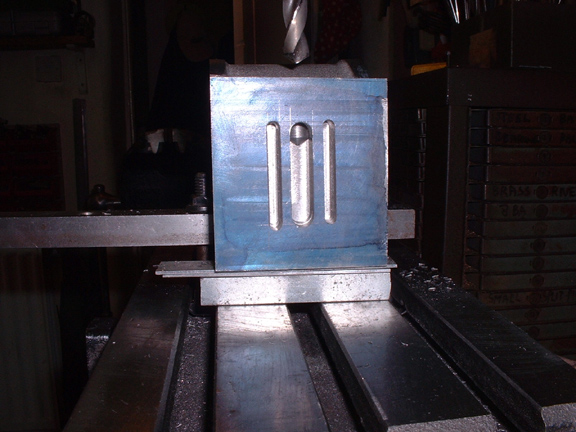
Here are the HPs all bored and the exits into the cylinders milled out to make sure there is no choke point. No problem about making them 1/4" deep into the bore because all that matters is that they don't foul the piston rings. This is where many people make a mistake, no point in having a good size steam passage and choking it with a little slit into the cylinder once the lid is on.
The big cylinder needed a different set-up. I filed the exit into the bore by hand and then started the bore for the steam passage with a 1/4" slot drill so there was no wandering about on entry due to the sloping face. Once started, I poked the 1/4" drill through until it hit the steam port.
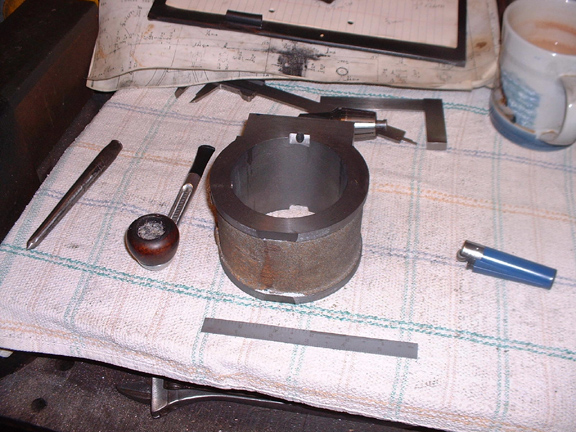
Here's the LP cylinder finished. You might wonder why I have stuck to the same size steam passage for a larger cylinder. I was tempted to put two bores in at each end but then reflected that it wouldn't make any difference, indeed, the same size bore would be better. Remember what I have said elsewhere about balncing the LP against the HP to even out the power output as much as possible? This is done on a full size engine by adjusting the cut-off on the LP valves to restrict the flow of steam into the cylinder and raise the pressure in the receiver pipe between the HP and the LP. This puts back pressure on the HP and means that when running on steam the supply is balanced out between the two because as the pressure in the receiver rises, the volume of steam going into the LP rises also because there is more pressure behind it. This is exactly what will happen here and if I'm right, the LP will carry more load giving a more even output of power from the engine. Well.... that's my story and I'm sticking to it. Tomorrow we have to start thinking about valves.......
Stanley Challenger Graham
Barlick View
stanley at barnoldswick.freeserve.co.uk  |
Stanley
Local Historian & Old Fart
36804 Posts
|
|
Posted - 05/10/2007 : 06:01
Or pistons.........
Stanley Challenger Graham
Barlick View
stanley at barnoldswick.freeserve.co.uk |
Stanley
Local Historian & Old Fart
36804 Posts
|
|
Posted - 05/10/2007 : 11:12
Nowt done yet.... I've been vacuuming the Flying machine out and being domestic. I've given it some thought and the order of play is make the pistons and fit them to the rods but not permanently. Take them off and make over 100 2BA studs for fixing the cylinders and lids. Fit the cylinders, permanently fit the pistons, make the valves and fit the steam chests and lids and finish with the eccentrics and rods. Then two flywheels for the single engines, none needed for the compound as I shall fit it up marine style. Then lots of tiddly bits, eight drain cocks, three steam valves and eight lubricators. Three displacement lubricators and...... oh dear, they might be finished apart from little jobs like lock nuts and bases.
I'm already thinking ahead, I have a choice between two marine engines or a Myford Dividing head.... I also have a beam and column for the ME beam engine.........
Stanley Challenger Graham
Barlick View
stanley at barnoldswick.freeserve.co.uk |
Gugger
|
Posted - 05/10/2007 : 20:33
Stanley, don’t forget, you also have the flywheel for a Corliss. So, the next logical project offers itself?!
Best regards
Walter
|
softsuvner
|
Posted - 05/10/2007 : 22:43
Stanley
Please, not the Dividing Head, I know many model engineers like to make all the gizmos for their machine tools, but some of them never seem to make anything else.
I vote for the Corliss too. I'm going to the Midlands Model Engineering Exhibition a week next Monday, shall I look around for some more suggestions?
Malcolm
|
Stanley
Local Historian & Old Fart
36804 Posts
|
|
Posted - 06/10/2007 : 05:54
Don't bother. I will never make a mill engine. Problem is you have to make them 1 1/2" to the foot or else the tiddly bits get to be watchmaking. Johnny made a wonderful mill engine but even he got fed up before it was finished. I'm making the dividing head because I have a kit. I don't need one, I have more dividing gear than I can poke a stick at but thought I'd make it and then give it to Doc to sell for the site contributions. Actually, I fancy the beam engine.
But before I get there I have to finish what I'm doing, nowt sadder than advertisements for uncompleted projects.... I did nothing in the shed yesterday, I had a day off. By the way, where do you live Malcolm. If you are local to Barlick, get me about 8 feet of 2BA threaded rod and some nuts, I'll pay you for them.
Stanley Challenger Graham
Barlick View
stanley at barnoldswick.freeserve.co.uk |
Stanley
Local Historian & Old Fart
36804 Posts
|
|
Posted - 06/10/2007 : 05:55
Forget the studding, I just looked and Newark is not local!
Stanley Challenger Graham
Barlick View
stanley at barnoldswick.freeserve.co.uk |
Stanley
Local Historian & Old Fart
36804 Posts
|
|
Posted - 06/10/2007 : 06:01
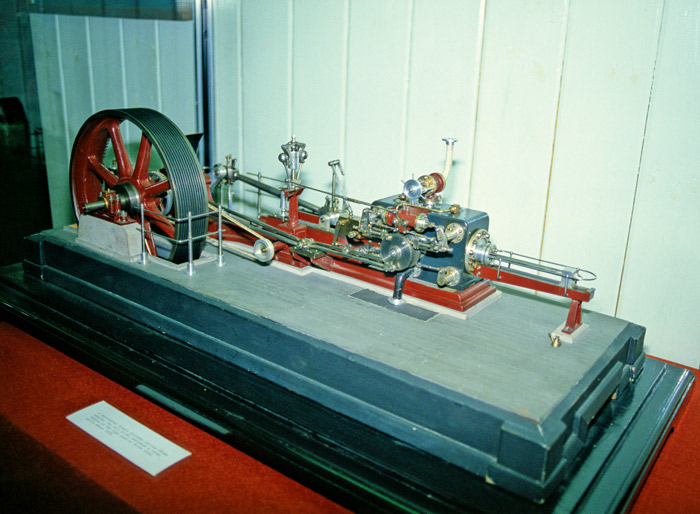
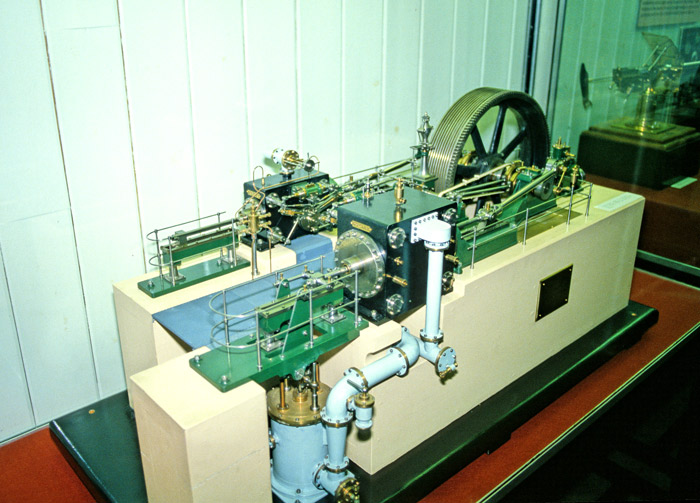
Malcolm, just looked at the engine pics, the cross compound is Johnny's unless I'm badly mistaken. They ran it on compressed air and let the bores rust. Moorside Museum? The other one looks like one of Amos's engines.
Stanley Challenger Graham
Barlick View
stanley at barnoldswick.freeserve.co.uk |
Stanley
Local Historian & Old Fart
36804 Posts
|
|
Posted - 06/10/2007 : 17:09
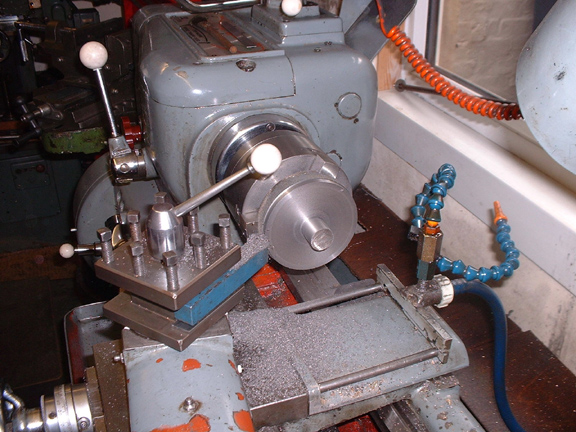
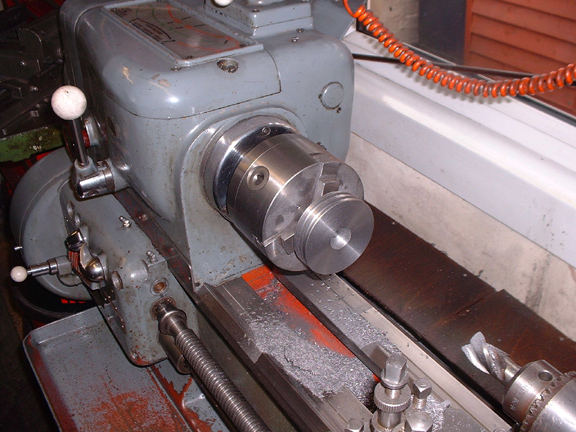
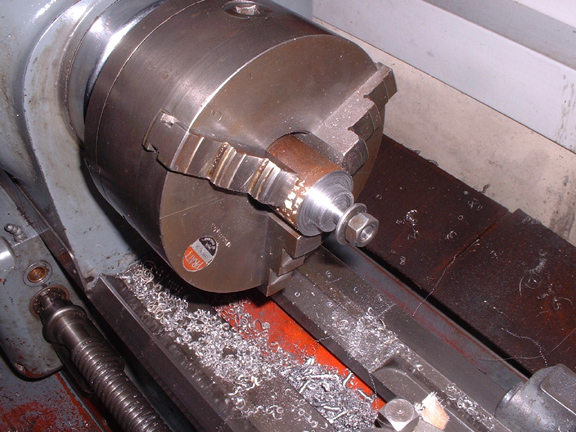
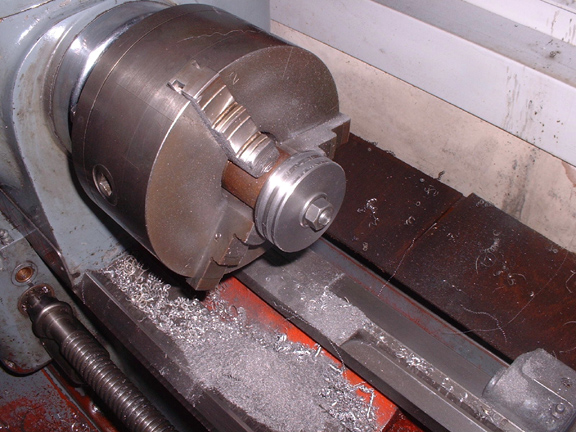
It's been a piston day. God Bless Newton, he always left a good knob on his castings so you could get hold of it. I'me tidying it up here before reversing it.
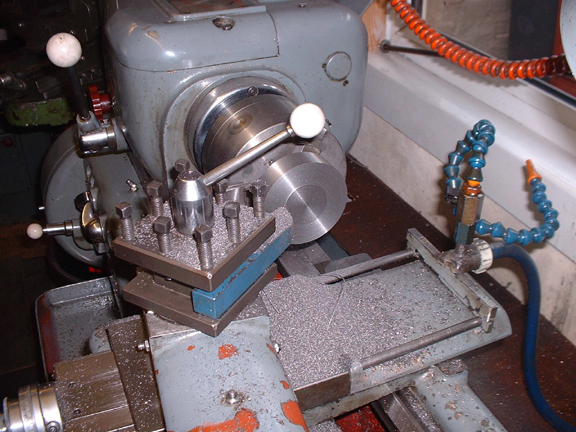
Finishing cut on this face of the 3 1/4" piston. The diameter is perfect and tomorrow I'll bore it and cut the piston ring grooves on the same setting tomorrow and then turn it over and chop off the knob and reduce it to 3/4" thick. All the blanks for the single engines are made and ready for the same treatment. Four hours well spent.....
Stanley Challenger Graham
Barlick View
stanley at barnoldswick.freeserve.co.uk |
softsuvner
|
Posted - 06/10/2007 : 23:19
Stanley
Sorry I can't help with the 2Ba studding, the best part of these exhibitions can often be finding those useful bits of material that you need.
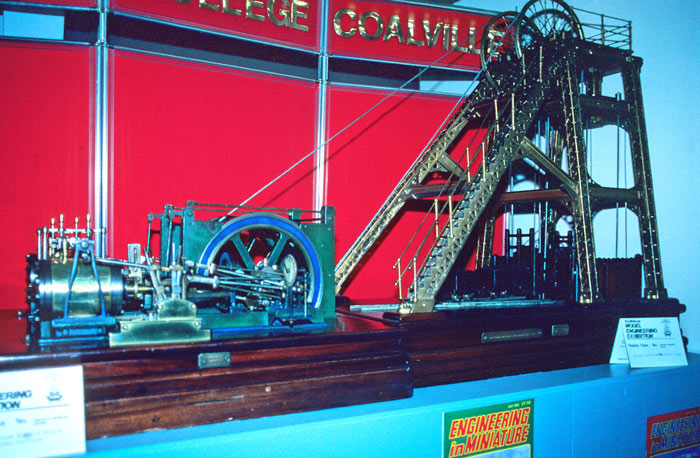
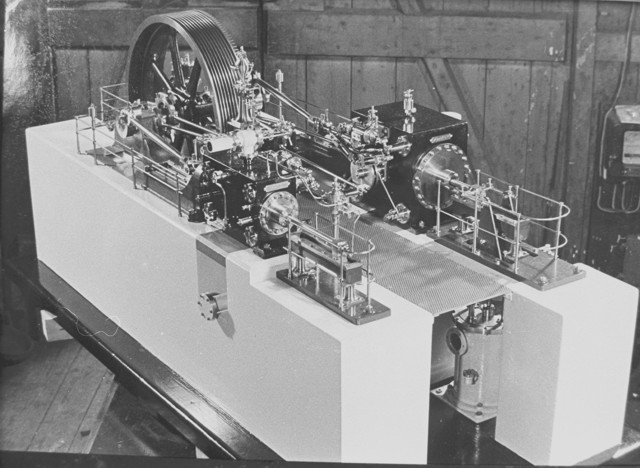
Thought that you might be interested in these shots, something to consider over a pipe and a glass of single malt.
The first engine caught my eye at one of the old Stoneleigh Exhibitions in 1989. If I remember right, it was made in the 1920s by an engineer at one of the Leicestershire pits. I believe the headstock components were made from brass castings, quite a piece of work on the tools of those days.
As you surmise, the other two photos were taken through the glass of the cases at Moorside Mill Museum in Bradford. I don't honestly remember who made them, or if they were even credited, but lovely pieces of work nonetheless. So rarely do you see models of the larger mill engines. I can fully understand your reluctance to start something like them, the thought of tapping stud 'oles for the valve bonnets or the cylinder covers, in that size frightens me!
A beam engine, now that would be nice.
Malcolm
|
Stanley
Local Historian & Old Fart
36804 Posts
|
|
Posted - 07/10/2007 : 05:35
Here's the engine in Johnny's shed behind his house in Federation Street.
Stanley Challenger Graham
Barlick View
stanley at barnoldswick.freeserve.co.uk |
Stanley
Local Historian & Old Fart
36804 Posts
|
|
Posted - 07/10/2007 : 11:16
An early login today.... I've finished the piston for the big cylinder and I'm ready to start cutting the piston rods back to the right size and shape.
First job theis morning was to cut the piston ring grooves, then bore the centre and finally counterbore it enough to make room for the socket to tighten the nut up. I've done a lot of thinking about fixing the piston to the rod and have decided to keep it dead simple. Piston is bored 3/8 so when the rod is cut down from 13/32 there will be a small shoulder for the nut to vramp the piston onto it. I shall probably put some shaftlock on as well for the final assembly. The piston will never come off and it isn't driving 1000 looms! By the way, if you ever have to dismantle anything fitted with shaftlock, just warm it up almost to dull red. The glue disinegrates.
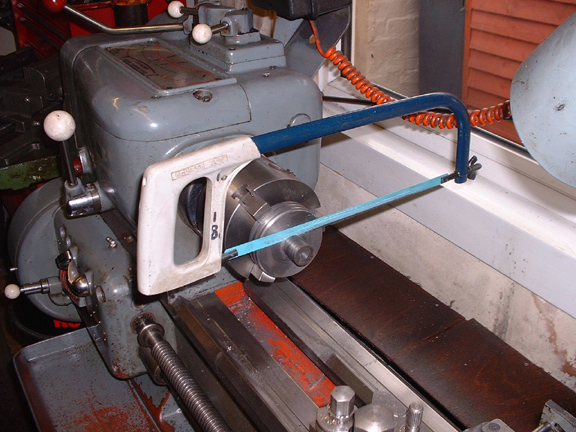
Turn the piston round, cut the boss off with the hacksaw and face this end to dimension.
The engines are all sat there with pistons. This afternoon I'll get the rods to size and finish the small pistons. They can all sit then and wait while I make hundreds of studs........
Stanley Challenger Graham
Barlick View
stanley at barnoldswick.freeserve.co.uk |
Stanley
Local Historian & Old Fart
36804 Posts
|
|
Posted - 07/10/2007 : 15:52
What's he up to here..... After sorting the small pistons I needed to mark the piston rods accurately for the cut so I made a simple jig that gave me the required 1/8" clearance. It might look a bit like overkill but believe me, anything that makes sure this cut is accurate is a good thing. Imagine the state I'd be in if I got it wrong and had to make another one! I've blued the rods and marked them all at TDC.
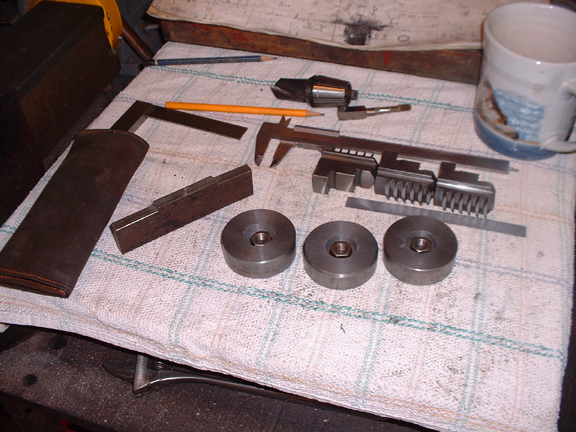
That's enough for the day, here are the pistons and nuts all ready for fitting to the rods. All I have to do now is pull the rods out, cut them back to length. Turn the rod to 3/8" for 3/4" and thread the end 3/8" 3/8" whit. I'll temporarily fit the pistons and check I have the stroke right and then I can give some thought to drilling and tapping all the fixings on the cylinders and standards.
Stanley Challenger Graham
Barlick View
stanley at barnoldswick.freeserve.co.uk |
Stanley
Local Historian & Old Fart
36804 Posts
|
|
Posted - 08/10/2007 : 06:32
I forgot to mention the piston rings..... I have a casting for making the rings for the big cylinder but I'm going to have to give some thought to the small ones. I'll have to look in the treasure box to see what I have. If all else fails I'll make them out of gunmetal. Never tried that before.... can't do any harm.
Stanley Challenger Graham
Barlick View
stanley at barnoldswick.freeserve.co.uk |
Stanley
Local Historian & Old Fart
36804 Posts
|
|
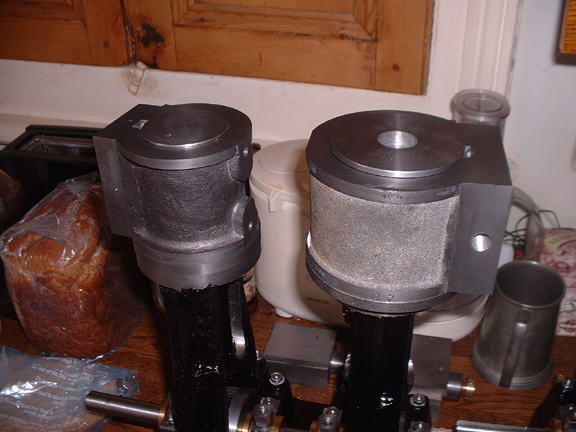
Posted - 08/10/2007 : 19:40
The engines look so much better with the bores bunged up!
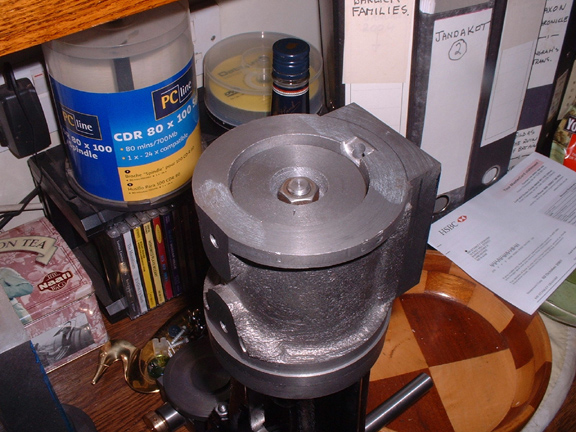
I decided that there was no point fitting the pistons unless I had the piston ring grooves in them. I originally thought I'd cut them while they were mounted on the piston rods but decided it would be safer to make a fixture specially for the job.
Good decision, very rigid and a doddle cutting the grooves. So, at close of play, all the engines have the pistons finished (apart from the rings) and fitted. Still got a tight spot on the big cylinder but I'm not bothering about that until I get to the stage of bolting the cylinders down because they'll all need a bit of re-fitting then. Some heavy duty marking out and drilling tomorrow ready for the studs but once I have the holes done I shall fit the steam chests and make the valves before the cylinders are actually bolted down. Lots do yet but a lot has been done. Nice to here the air whistling out of the ports when I turn the engines over even though the rings aren't in yet. Pretty close fits. As I say, probably too close when the cylinders are bolted in place but easig tight spots is good, better than having everything sloppy.
Stanley Challenger Graham
Barlick View
stanley at barnoldswick.freeserve.co.uk |


