| Author |
 Topic Topic  |
|
Tizer
|
 Posted -
22/03/2010
:
11:53 Posted -
22/03/2010
:
11:53
|
I wrote some time ago that I was intending to make my first attempt at building a computer and promised that I would relate the story here on OGFB. I bit the bullet about 10 days ago, ordered the components on-line from Dabs, received them last week and dived into action.
I ran into a problem due to being sent a faulty motherboard which Dabs replaced, so the following posts describe a lot of work sorting out what was wrong before we realised it was the motherboard. Read these posts if you want all the details. If you want just the description of how the PC was built without details of the glitch I've now written it up later in this thread. See it on page 8.
Edited by - Tizer on 06/05/2010 10:35:18
|
|
| Replies |
| Author |
|
|
catgate
|
 Posted - 14/04/2010 : 22:43 Posted - 14/04/2010 : 22:43
quote:
pluggy wrote:
Ahh, LTS, Stable, but old. I found it a pain having old versions of applications and utilities when you're trying to do something new.
Image editing - GIMP
Image Store and retreival = F-spot
OCR, less clear cut but several are available, its very much an old technology that gets used less and less as time goes by.
You won't need anti virus, Windows has seen several hundred thousand viruses over the past 20 years. Linux has seen a small handful, the chances of coming across one in the wild are nil.
Edited by - pluggy on 14/04/2010 20:04:53
It is all very well for you young chaps, but when you get into the late 70s, like us old buggers, you look forwards to something reliable and predictable. That's why I ditched M$.
I have looked for OCR progs inUbuntu and have met with little if any success. What have you seen that is worth downloading.
Every silver lining has a cloud.
 |
Stanley
Local Historian & Old Fart
    
36804 Posts

|
|
 Posted - 15/04/2010 : 05:07 Posted - 15/04/2010 : 05:07
Peter, don't worry, I don't do tangents. I'll learn to cope quicker if it's all I have got. No different than my first Amstrad. Having to start from square one will get my brain buzzing.
Catty, I am only 38.
I shall be guided by my consultant but my present preference is to format the programme disk and have a clean start in a new world. By the way, will Linux be able to read the data disk which is in NTFS file format? How about file fragments in Linux? I'm assuming my faithful Discmaster won't survive.
Stanley Challenger Graham

Barlick View
stanley at barnoldswick.freeserve.co.uk  |
pluggy
|
 Posted - 15/04/2010 : 08:32 Posted - 15/04/2010 : 08:32
quote:
Stanley wrote:
By the way, will Linux be able to read the data disk which is in NTFS file format? How about file fragments in Linux? I'm assuming my faithful Discmaster won't survive.
Yes Linux can read (and write on Modern Distros) NTFS disk partitions. Ubuntu 9.10 uses EXT4 by default. Defragging isn't something you need to to do in Linux because of the way it orders files on the drive. Its neither appropriate or easily possible. M$ puts all the files together at one end of the disk and has one 'Index', Linux spreads them out across the drive and and has lots of indexes called inodes. You can read up on it here http://en.wikipedia.org/wiki/Inode but in practice it just works.
Need computer work ?
"http://www.stsr.co.uk" 
Pluggy's Household Monitor  |
Tizer
|
 Posted - 15/04/2010 : 09:43 Posted - 15/04/2010 : 09:43
Just for clarity, when Stanley refers to Peter in this thread he means me, Tizer alias Peter. Don't believe his 38, he's really 17.
Catgate, I scan photos etc using `Xsane' on Ubuntu and find it very good although quite different from the software I used on Windows many moons ago. I too was flummoxed by trying to do OCR of text on Ubuntu - until I discovered `Tesseract'. It's a bit basic and geeky because it uses the terminal but it's output is very good quality, given decent starting copy (as for any OCR). You have to scan the text as line art to a TIF file, then run a tesseract command on that file in the terminal and it dumps the output into a file for you. It's really very simple. I'm busy today and then on holiday over next week but after that I'd be happy to answer any question it and help you get it going - but you'll probably crack it yourself. Google Xsane and Tesseract.
 |
catgate
|
 Posted - 15/04/2010 : 10:50 Posted - 15/04/2010 : 10:50
quote:
Tizer wrote:
Just for clarity, when Stanley refers to Peter in this thread he means me, Tizer alias Peter. Don't believe his 38, he's really 17.
Catgate, I scan photos etc using `Xsane' on Ubuntu and find it very good although quite different from the software I used on Windows many moons ago. I too was flummoxed by trying to do OCR of text on Ubuntu - until I discovered `Tesseract'. It's a bit basic and geeky because it uses the terminal but it's output is very good quality, given decent starting copy (as for any OCR). You have to scan the text as line art to a TIF file, then run a tesseract command on that file in the terminal and it dumps the output into a file for you. It's really very simple. I'm busy today and then on holiday over next week but after that I'd be happy to answer any question it and help you get it going - but you'll probably crack it yourself. Google Xsane and Tesseract.
Yes I use Xsane and Gimp for photo' "editing".
As far as OCR goes, although there are ways round the apparent absence of a good application for the job, with Pluggy mentioning it in his post I thought that someone may at last have found one.
I find it a bit strange, because way back in the pre-Windows days of the early 80s, when we were all still using DOS, GWbasic, Wordstar, Lotus 123 etc. I saw ( and used) a hand held OCR reader. It was just passed across an area of text and that area of text was placed into a document. for typing.
I do not know what it was called or even if it was a proprietory item. Thinking about it just now, and knowing the ability of the chap who had it, I have just realised as I write this that It may have been of his own construction,
I know that only a couple of years later he asked me if I could rig up a lens in a focusing housing because he wanted to make a cine camera using an EPROM as the "film". I got a lens and made the adjustable focusing and a body , he made all of the electronics and fitted iy all together ...and it worked.
VGA had just arrived and the results were "spectacular" at the time.
Every silver lining has a cloud.
 |
Tizer
|
 Posted - 15/04/2010 : 14:40 Posted - 15/04/2010 : 14:40
To do OCR with `tesseract' you will find tesseract in Synaptic Package Manager, so it's easy to download. Give it a whirl. Here are my own notes...
Scanning text for OCR using Tesseract (instead of the Xsane built-in OCR).
Scan on Line Art at 300 dpi and save as a TIF file with the .tif ending (do not use the Xsane OCR function). The Xsane File Type setting in Preferences can be on `no compression' or on `Group 3 Fax', both work OK.
Open Terminal and use the command as in this example:
tesseract tizer/example.tif result
for a graphics file called example.tif in the tizer folder. The command posts the text in the file `result.txt' in the Home folder. Simple as that!
 |
Stanley
Local Historian & Old Fart
    

36804 Posts

|
|
 Posted - 15/04/2010 : 15:30 Posted - 15/04/2010 : 15:30
Catty, I had one of those and I'm not sure but was it Logitech? One of the good names anyway. Bit like a barcode scanner, or even a very small Hoover sucking the text up!
Stanley Challenger Graham

Barlick View
stanley at barnoldswick.freeserve.co.uk  |
catgate
|
 Posted - 15/04/2010 : 16:21 Posted - 15/04/2010 : 16:21
I might have go with tesseract....just for devilment.
Every silver lining has a cloud.
 |
catgate
|
 Posted - 15/04/2010 : 17:14 Posted - 15/04/2010 : 17:14
Well, well, well.
I downloaded it and ran it and I was more impressed than I expected to be, from other previous reports of it performance.
The document produced from the .tif file needed a little tinkering...well more than a little, but it could be useful at some point in the future.
Thank you, chaps.
Every silver lining has a cloud.
 |
Tizer
|
 Posted - 15/04/2010 : 20:16 Posted - 15/04/2010 : 20:16
We strive to please. This is a quick note to let you all know I'll be offline for the next 8 days but when I return I'll write up more about the experience building the new PC. I wasn't confident enough to do the disk partitioning in the gParted software so I ran the Ubuntu install instead and used the facility offered there. Before that I read up more about partitioning and found this Ubuntu guide excellent:
https://help.ubuntu.com/community/HowtoPartition/PartitioningBasics
Then I dived in and created a full home (data, /Home) partition on the second hard disk (sdb) and three on the first (sda): (1) ext3 / (2) linux-swap (3) ext3 /backup. After finishing the install and rebooting, this seemed to work OK. The /backup folder needed its permissions changing from root to user to allow me to add, edit or remove files but otherwise it all looks normal. The PC is sitting on its own at the moment and when i get back I'll swap it with my old PC and check it out with the printer and scanner.
But the verdict at present is...a fast and powerful PC at a good price and I've learnt a lot at the same time. I'm a happy bunny!
PS. Another job being done in parallel was the restoration of our old garden shed. We thought we would have to replace it due to rotten areas of the wood and a general feeling that it would fall down soon. But I did some work on the window frames and othr parts, and reinforced some corners, and now it's looking good. Janet's verdict? "Well, you've saved a few hundred pounds there, that should cover the cost of that new PC you were going to make for me!"
 |
Stanley
Local Historian & Old Fart
    

36804 Posts

|
|
 Posted - 16/04/2010 : 05:45 Posted - 16/04/2010 : 05:45
A smart woman. Don't let her lift any heavy weights over the next week!
Stanley Challenger Graham

Barlick View
stanley at barnoldswick.freeserve.co.uk  |
Tizer
|
 Posted - 29/04/2010 : 16:45 Posted - 29/04/2010 : 16:45
My intention had been to relate how I built a computer but it was thwarted by a faulty motherboard which had to be returned and eventually replaced. That spread the building process over several weeks and disrupted the story. To get back to a simple story I will now explain how it should have unfolded! A lot of this is repeated from earlier posts but it will be helpful to collate it here for anyone who wishes to follow in my footsteps.
My intention was to build a fairly powerful PC for general office work and home use from parts bought at Dabs.com. Not an ultra-powerful gaming PC but one that could cope with multiple applications being open simultaneously and with handling big files. Components would be chosen so that it could be used as either a 32-bit or 64-bit PC. I wanted to start with an Intel processor and used the following benchmark web page to choose one that provided good performance without straying into high-priced gaming territory: http://www.cpubenchmark.net/common_cpus.html
The other parts were chosen from what was in stock at Dabs to be compatible with this processor and with each other (by checking the spec on the Dabs pages and the manufacturers' web pages). The headings from the relevant Dabs pages are here:
Processor: Intel Core 2 Quad Q8300 2.50GHz LGA775 FSB1333 4Mb Retail £120
Motherboard: Asus S775 Intel P43 ATX DDR2 Audio & Gigabit Ethernet £61
Memory: Kingston ValueRAM 2x2GB 667MHz DDR2 Non-ECC £75
Hard drive (SATA): Seagate Barracuda 7200.12 500GB 7200RPM S300 16MB £41 each
Graphics card: Best Value POV GeForce 8400GS 450Mhz 512MB PCI-Express DVI £31
DVD drive (SATA): Best Value LiteOn 24x Int. DVDRW Black SATA + S/W £14.10
Case: Best Value Shiny Black Midi Case 450W £26.27
(Take care, the prices shown above may have changed. Prices include VAT and the delivery was free)
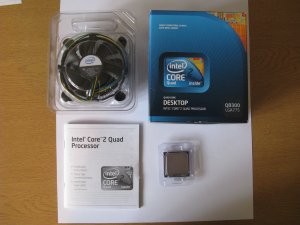 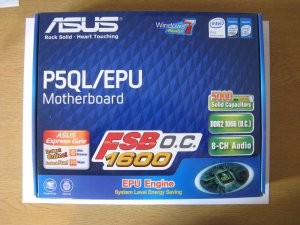 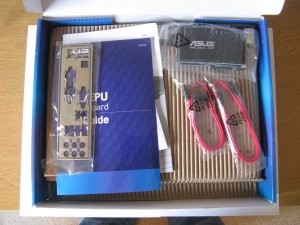 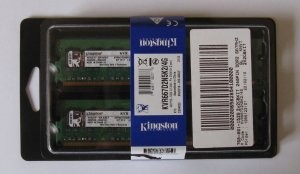 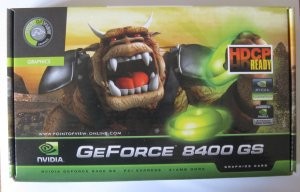 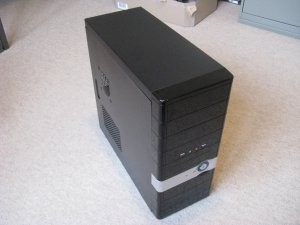
Photos: CPU + heat sink, motherboard box, board box contents, memory modules, graphics card box, case.
I bought two hard disk drives because I want one as a back-up. Monitor, keyboard and mouse were not needed because I already have them. I would have gone for a motherboard with onboard graphics (so that a graphics card was not needed) but none of them was fully compatible with the other components. I took the precaution of showing the list of components to OGFB member Pluggy (Stephen Taylforth) to make sure I hadn't made any obviously bad choices.
Towards the end of the build I realised that more cables were needed. The case power unit provided only one SATA power cable whereas I needed to connect two SATA hard drives and one SATA DVD drive. The motherboard came with two SATA data cables but again I needed three. To solve this I bought an extra SATA data cable and a molex-to-twin SATA converter power cable (molex connectors are the old type power connector and there were plenty of these on the power unit). These were cheap and on free delivery at Amazon from PC Parts so I bought them there (I actually bought more than one of each because it's worth having spares). The cables were described as:
Cable-Tex MOLEX to twin 2 Sata Power Adaptor Lead / Convertor Cable £1.99
Cable-Tex SATA Data Cable, Serial ATA 45 cm Lead £1.99
You will notice that I have not listed an operating system for purchase. That is because I don't use Windows, I've been on Ubuntu Linux for years which is much better and is free! The case arrived from Dabs the day after ordering and the rest of the components a few days later. I read advice on the Internet about building PCs, such as this web page:
http://en.wikibooks.org/wiki/How_To_Assemble_A_Desktop_PC/Choosing_the_parts#What_should_affect_the_choice_of_any_part.2Fperipheral.3F
and this forum:
http://forums.mysuperpc.com/
and the book `Building a PC in easy steps':
http://www.ineasysteps.com/books/details/?9781840783261
Throughout the build I've taken care to protect the circuitry by `earthing' myself frequently by touching the case or other metal objects such as a radiator, and avoided touching any of the exposed circuitry on the boards. Every component was kept in its antistatic bag until needed.
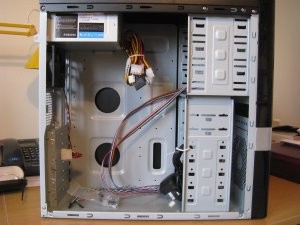 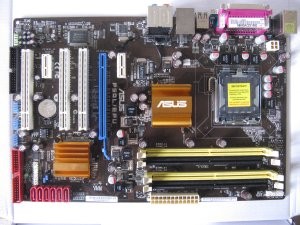 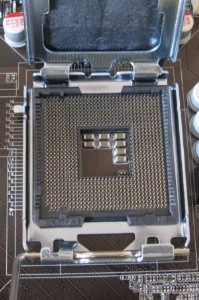
Photos: empty case, motherboard at start, CPU after placing on the board socket.
I followed the advice that it is easier to fit the processor (CPU), its heat sink, and the memory modules with the motherboard outside the case, taking care not to damage the board. I placed a sheet of polystyrene packaging foam on my desk, covered it with the antistatic bag then sat the motherboard on top of the bag. The first step is to fit the CPU into the seating on the motherboard then fix the heat sink above it. This heat sink had its own thermal paste already in place. Intel has detailed instructions and graphics here:
http://www.intel.com/cd/channel/reseller/asmo-na/eng/299985.htm
I had some difficulty pressing the heat sink feet through the motherboard even though I had them correctly oriented and had to resort to a small amount of silicone lubricant on each foot of the sink to prevent having to exert a dangerous amount of pressure on the board. Once fitted, the heat sink fan's cable can be connected to the motherboard.
The two matched DDR2 memory modules were then put into sockets of the same colour as instructed in the motherboard manual (this is important - if you put two modules into different colour sockets you won't get all the effective memory). After fitting the`stand-off' screws to the bottom of the case, I placed the motherboard in position and fixed it with 6 screws. Before putting the board in position you need to fix the I/O (input/output) shield to it (the thin metal structure with holes for all the ports at the back of the PC). This proved to be a fiddly job! Then I attached the graphics card to the PCI x16 slot of the mother board. Finally all the leads were attached (details are given in the motherborad manual) and a check made to ensure everything was ready for a test with the monitor and keyboard. The onboard LED on the motherboard should light up when the power is switched on, the fans should start up, and the PC should boot into the BIOS and show information on screen. If there are any problems you should hear beeps which give you information about the fault.
It was at this stage that I had a serious problem - no beeps, no fan and nothing on screen. It proved to be a `dead' motherboard which had to be replaced. If you are attempting a build and encounter a problem, go back to the beginning of this thread and read the tests and diagnoses for help, but most people find no problems at all.
Once I got the replacement motherboard the PC booted up OK. The fans started, there were no beeps, and the BIOS screen came up on the monitor, so all was well. The next step was to connect the hard drives and the DVD drive. A slight temporary hitch resulted when I realised that the power unit provides only one SATA power cable. The case/unit combo was listed on Dabs as "24 pin and SATA" but nowhere did it say how many SATA power cables. As mentioned above, I bought a converter cable to solve this problem and also an extra SATA data signal cable because I was one short.
Once the extra cables came I connected up the drives and all appeared to be working OK. However when I came to install the operating system it did not recognise the hard drives. OGFB member Catgate predicted it would need "something geeky" doing in the BIOS settings. Stephen `Pluggy' Taylforth came to the rescue and told me that in the BIOS I should change the hard drive SATA mode to `AHCI' and `compatible' and it then worked perfectly. (To enter the BIOS, start up the PC and as soon as something comes on screen, press your Delete key. This will bring up the BIOS settings.)
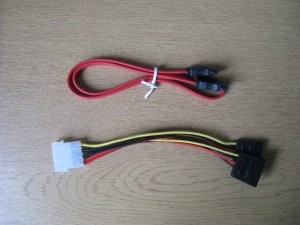 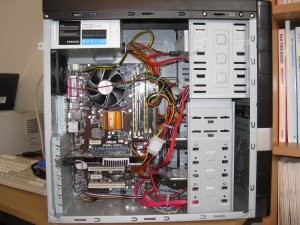 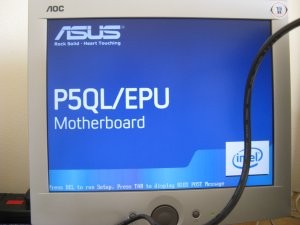 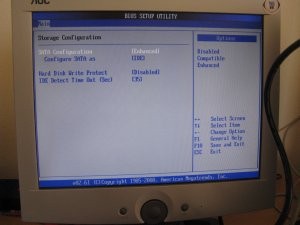 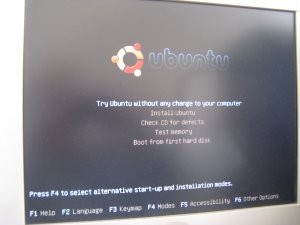
Photos: extra SATA cables (data at top, molex to twin SATA at bottom), the finished PC, the screen display at first boot, the BIOS hard drive settings before change, the Ubuntu screen on loading the CD.
Installing Ubuntu Linux is straightforward. For anyone who wants to know more about Ubuntu, have a look at the thread titled `Ubuntu and kicking the Windows habit' on these forums. If you need someone to install it for you or help you understand it, if you live near Barlick contact Stephen Taylforth (`Pluggy' on these forums). You could build the same computer as I have described but use it with Windows, or you could have both Windows and Ubuntu installed in what is called a `dual boot' setup. If you already have a computer with windows on it you can install Ubuntu alongside.
Here is what I did. First get your Ubuntu operating system (OS) software by going to this web page using your present computer:
http://www.ubuntu.com/GetUbuntu/download
and downloading the software onto your present computer's hard disk. If you want a different version to the one offered (e.g. 64-bit v. 32-bit), click the line "Alternative download options, including Ubuntu installer for Windows" and choose from the offerings. Once you have the file on your hard disk you need to burn it onto a CD. This has to be done a special way because the file is downloaded as an image and this has to be converted to folders and files. Follow the instructions here:
https://help.ubuntu.com/community/BurningIsoHowto
This disk will be used to install Ubuntu onto your new PC but first you have to change the boot settings in your new PC's BIOS so that it will start from the CD. Start up the new PC and as soon as something comes on screen, press your Delete key to enter the BIOS. Under the boot menu, change the boot order so that it will boot first from the CD/DVD drive. Exit the BIOS, insert the CD in the DVD drive and restart the PC. It will now boot up from the CD and load Ubuntu into the computer's volatile memory, i.e. not onto the hard disk. It first asks you to confirm the language and then the Start Up screen appears. At this stage you can try examples of Ubuntu from the CD without anything going onto the hard disk or check the CD for defects. Alternatively you can choose to install Ubuntu directly onto the hard disk, which is what I did. Consult this web page to see the steps involved and graphics showing screenshots:
https://help.ubuntu.com/community/GraphicalInstall
The basic installation process is simple and straightforward. You will have to wait for a while at some steps while the system files are loaded onto the computer. I wanted to customise my install and create hard disk partitions that used both hard disks, so before installing I read up more about partitioning and found this Ubuntu guide excellent:
https://help.ubuntu.com/community/HowtoPartition/PartitioningBasics
You can do a basic install with the normal single hard disk just by following the Ubuntu guide but if you want to partition disks as I did here are the details (you may need to read the background first to understand the naming of the partitions). On the first hard drive (sda) I created three partitions: (1) an ext3 partition for the / (root), (2) a linux-swap partition, and (3) an ext3 partition named /backup. On the second hard disk (sdb) I created one ext3 partition named /Home. If you are unfamiliar with Linux it will sound like gobbledegook but if you read the background it all becomes clear. After finishing the install and rebooting, this partition setup worked fine except that the /backup folder needed its permissions changing from root to user to allow me to add, edit or remove files.
This has given me a fast and powerful PC for about £412 (including VAT and delivery of parts) which includes the 2nd hard disk but excludes monitor, keyboard and mouse which I'm using from the old PC. The objective was not to "do it on the cheap" and make something for less than I could buy it ready built but instead to have full control over the components used, to learn how to do it, and to be able to fix or upgrade the PC. As a Linux user it also saved me having to pay for a Windows operating system that I don't want when I can have a better OS for free! At the moment I'm running 32-bit Ubuntu but will switch to 64-bit to coincide with the next Ubuntu version which is being released about now. In the past I have upgraded memory in my computers and added a second hard disk but I've never built a PC and I'm certainly not a computer expert, techie or geek, so if I can do it you can - and you can get friendly help here on the OGFB forums too. It also makes me realise that children should be taught to build computers at school - after all, they are going to be using them so much in their lives they should know more about them and be able to choose for themselves whether they want Microsoft or Linux (or Mac).
Edited by - Tizer on 30/04/2010 16:28:41
 |
Tizer
|
 Posted - 30/04/2010 : 16:30 Posted - 30/04/2010 : 16:30
If you viewed the above post shortly after it was submitted you will find that there are now photos which were added at about 4.30pm on Friday, 30th April 2010.
 |
Stanley
Local Historian & Old Fart
    

36804 Posts

|
|
 Posted - 30/04/2010 : 16:53 Posted - 30/04/2010 : 16:53
Glad you've got there!
Stanley Challenger Graham

Barlick View
stanley at barnoldswick.freeserve.co.uk  |
Tizer
|
 Posted - 18/05/2010 : 20:06 Posted - 18/05/2010 : 20:06
Well now I've got there twice, this time making a similar PC for Mrs Tiz! I tried to get the same set of components from Dabs but had to take an alternative graphics card because the original one is no longer stocked, and I chose different memory modules because the original had gone up in price by about 50% (!). So the spec is as before except for:
Memory: Crucial 4GBKIT (2GBx2) 240PIN DDR2 PC2-5300 NON ECC £85.41
(Now showing at £96.50 on 18th May 2010; the original Kingston memory had gone up from £75 when I bought it to £105 when I bought the second lot of components, but has dropped to £93 on 18th May. The Dabs prices are changing all the time. The moral is, try to get your chosen memory on a day when it's cheap!)
Graphics card: Gigabyte Nvidia 8400GS OC 512MB DVI £28.59
I built this PC as I did for the first one and it all went well, working on first boot into the BIOS. I got the Ubuntu installation done although it was a bit tricky because of the partitions I wanted on the two hard disks. Everything seemed perfect until....the screen froze (shades of Windows!!). The mouse cursor was still mobile but nothing else was working. I thought it was the partitioning which I got a bit messed up and therefore did a re-install. No better, freezing again. Then thought it was something wrong with the hard disks, took one out and did a default install on the other. Still bad. So then disconnected both disks and booted into the Ubuntu Live CD, i.e. working only from RAM, not hard disks. Still froze up. Then wondered about nVidia graphics drivers but couldn't get at them - when I used the Admin/Hardware Drivers function it couldn't access the web address to get the drivers.
To cut a long story short, I was in Catch 22 - when the PC stayed unfrozen long enough for me to download all the Ubuntu updates it was then able to access the appropriate web repository to get the latest driver and install it. Now all seems to be well! I set up the network and transferred Mrs Tiz's data files and hidden files and it's been running for hours (and lots of opening and closing applications etc) with no freezing.
 |
|
|
|
|