| Author |
 Topic Topic  |
|
Stanley
Local Historian & Old Fart


36804 Posts

|
|
 Posted -
29/07/2011
:
06:27 Posted -
29/07/2011
:
06:27
|
New start as old topic was getting too big. Here's the LINK for the original topic.
Sheds are centres of honest endeavour and sanity, rare things these days. Please join in and tell us what you are doing in your shed. All are welcome!
[By the way, if I occasionally seem to be stating the bleeding obvious, it's because I'm aware of the fact that not everybody has the same experience so please forgive me.]
Stanley Challenger Graham

Barlick View
stanley at barnoldswick.freeserve.co.uk
|
|
| Replies |
| Author |
|
|
Stanley
Local Historian & Old Fart
36804 Posts
|
|
Posted - 03/12/2011 : 05:45
Bad news and good news. No work in Shed yesterday but I wrote an article for the paper and got lots of housework done! I'll be in there today.......
Stanley Challenger Graham
Barlick View
stanley at barnoldswick.freeserve.co.uk  |
Stanley
Local Historian & Old Fart
36804 Posts
|
|
Posted - 04/12/2011 : 07:04
Yesterday started well, completed the cuts on the first billet and set up for the second. However, the best laid schemes of mice and men gang aft aglay....
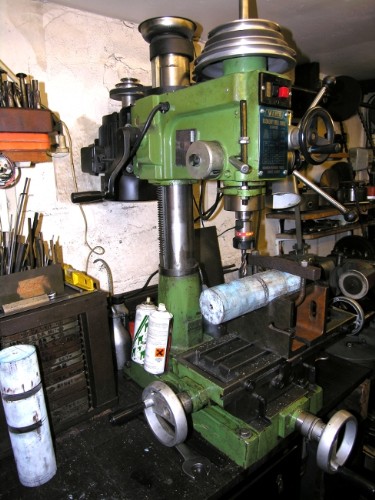
No, it wasn't an explosion! As I was doing the finishing cuts on the first billey I realised that a small idiosynchracy of the VM was getting rapidly worse. For a long time it has had a funny habit of being easy to traverse the bed away from the column but occasionally harder to send it in. I have often puzzled about this but it was never a big problem. Yesterday it got much worse, in fact it got so bad I knew I had to do something about it.
A bit of furtling revealed that the lead screw not buried under the bed was loose and it was this that was causing it to bind. Question was how to get to it to tighten it? The VM is a big lump, no way you can tip it over to get to the bottom so I decided (rightly as it turned out) that the shortest way round the problem was the long way, strip the beds and lead screws out and have a proper look. First job was to unbolt it from the bench so I could move it araound, the leadscrew under the bed is too long to get out without fouling the big surface plate. Once I had it free I dismantled the bottom end completely.
I found the problem. If you look closely the leadscrew nut is in the vice. It is threaded internally 5/16" Whit or an equivalent. A very strange size. Once I had the bed off and the base slide removed I made a few discoveries. The socket head screw that goes through the base to locate the lead nut was stripped in the nut. When I got it out I found that it only had about 4 threads of hold in the brass casting out of the 1 1/4" depth available to it. Definitely a three pipe problem and I took Jack for a walk and had my dinner. Then I decided bugger it, I've been up since 3am and deserve my rest so I went to bed for a sleep.
Not a bloody hope, I found I was lying there being nagged by something so in the end I got up and went back into the shed. I did some measuring and found that the socket head screw was a very loose fit in the housing in the base plate. After a bit of thought I came to the conclusion that for some reason, the fitter who put the nut on had not had the right socket screw but had said sod it! and carried on regardless. I shoved a drill 1/64" above 3/8" through the bore in the base plate. Tapped the hole in the lead screw nut out 3/8" Whit right down to the bottom. Found that one of my 3/8" holding down screws was just the right length and skimmed the head off so it would fit in the counterbore. Put some Loctite shaft lock in the lead nut and popped the longer socket cap screw in and tightened it up lightly, put the base back on and engaged the lead screw to make sure it was aligned properly and tightened it dead solid. That bugger won't shift again in my lifetime!
Big clean up on the bench, amazing how much muck there was under the bed. Cleaned and rebuilt the whole of the bottom end, Levelled the mill on the bench and tightened it down. Cleaned the VM up, oily fingerprints all over it and put all the tools away.
Cleanest and best adjusted miller in town. Goody!
Last thing was to get the angle vice back on the bed and set up the second billet. I took a couple of cuts and the problem has gone away. The slides are a bit snug at the moment but with no variations in them. No point trying to adjust he gibs until I have used it a bit and it has settled down. We are back in business!
It's always a bit of a bugger when things like this happen but all part of the game. Nobody ever promised it would be easy! The reward is the satisfaction of having retrieved the situation, finished up with a better mill than I started with and it hasn't cost anything but time. I am a smug little bunny this morning and ready to crack on with the shafts. Not a bad result!
Stanley Challenger Graham
Barlick View
stanley at barnoldswick.freeserve.co.uk |
Stanley
Local Historian & Old Fart
36804 Posts
|
|
Posted - 05/12/2011 : 05:20
Back on track. All the slots cut and ordinary machine vice back on the VM.Ready for some light turning!
One interesting thing revealed itself. The VM has always had a funny little quirk which I never really understood. There are a couple of screws on the front of the bed slide for locking it in place. (Two on the other slide as well) I have always found that if the screws were tightened to lock the bed the other slide tightened up slightly. Remember me saying yesterday that the slides were a snug fit? I found when I took the angle plate off the bed this tightening effect had gone away, the two traverses were perfect. What's been happening is that under certain circumstances of set up the bed distorts slightly and if you lock it this distortion is transferred to the base supporting the bed which of course carries the other slides. The angle plate must be slightly out of register on its bottom face and when tightened down is distorting the bed. The fitting of the slides is so accurate that this tiny distortion alters the alignment of the base slide. When I have a minute I'll pop it on the mill and take a light cut across the base to square it. Not a biggy but nice to have solved that little nystery. The nice thing about it is that it proves that the base slide is as near dead accurate as makes no difference. This means it will have a long and useful life, far beyond my lifetime!
One more thing. As I did the last slot in the billet the cutter was not right. A bad cut. I took it out and made a few adjustments to it and it was fine. My mistake was a tiny misalignment when I installed it in the T&C grinder for sharpening. Such a small thing but what a difference it made!
You've been very patient with me and we are now out of the BO description of the Newton Pickles method! We can now start to make some proper swarf!
Stanley Challenger Graham
Barlick View
stanley at barnoldswick.freeserve.co.uk |
Stanley
Local Historian & Old Fart
36804 Posts
|
|
Posted - 06/12/2011 : 07:08
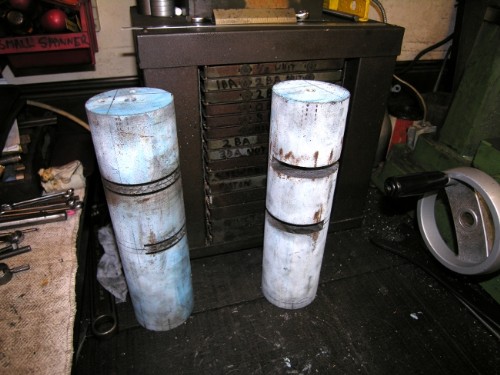
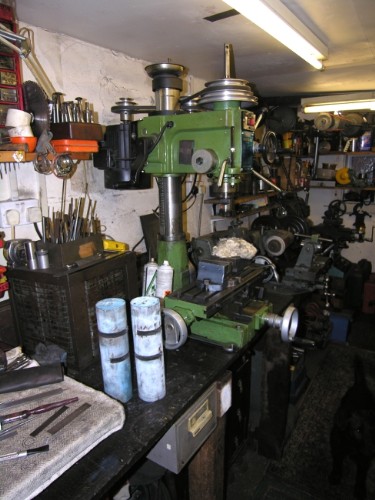
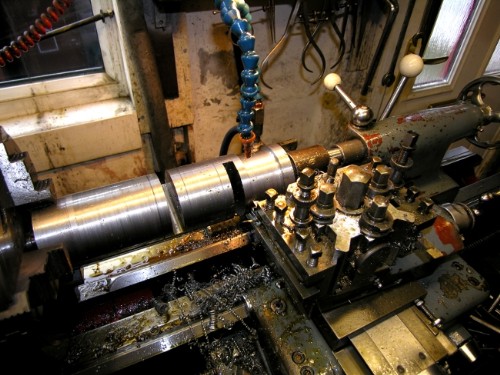
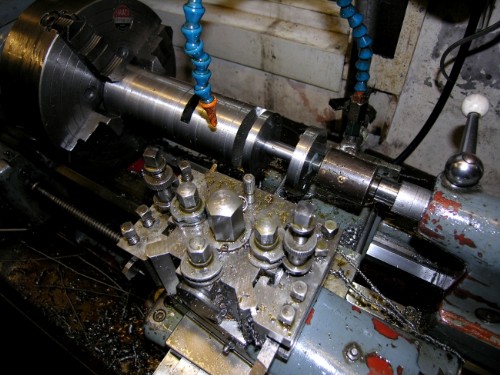
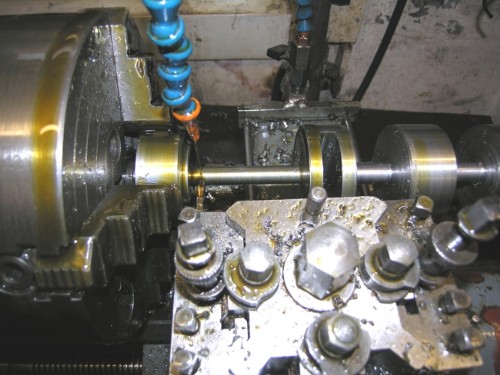
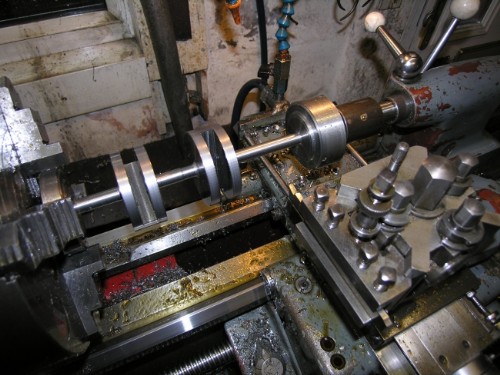
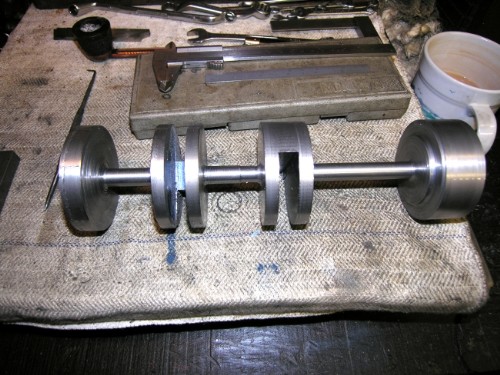
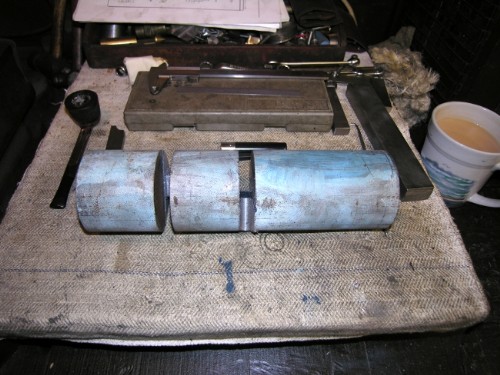
Here we are at last! Making some swarf. Get a billet in the lathe and start at the LP end. Face it off and get it turned concentric.
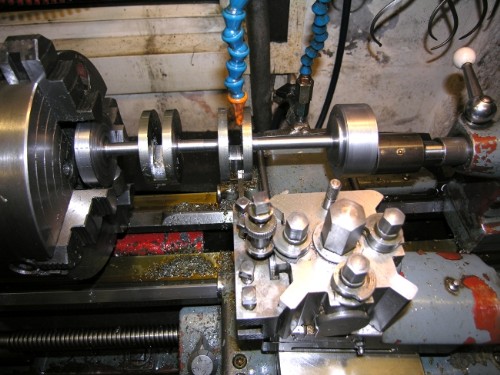
Once you have that end clean reverse the billet and it's now set up for most of the cutting. First job is to get it clean and parallell down the entire length. Notice that the centre in the tailstock is a live centre running on bearings. There is going to be a lot of heavy cutting and the friction of an ordinary centre can get serious as the workpiece gets warmed by cutting and expands. This happens with the live centre as well so keep checking as you are working and ease it back as pressure increases. The corollary of this is that when you go back to the work after it has cooled down always check the centre pressure, you'll find it has eased back and needs to be adjusted.
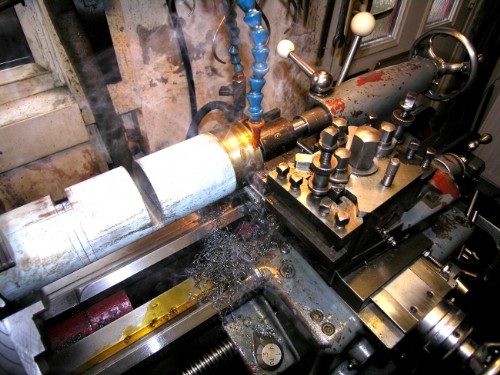
It took 15 thou to get a clean face all the way across the billet. Once you have this pop a pointed tool in and scribe the 3/8" thickness of the crank webs each side of the milled out slots. This is your cutting mark for the next stage, reducing the main of the shaft to the finished 1/2" diameter. Take note that you leave a 1/2" section at each end intact because this is carrying the centres you will need to make the crank journals.
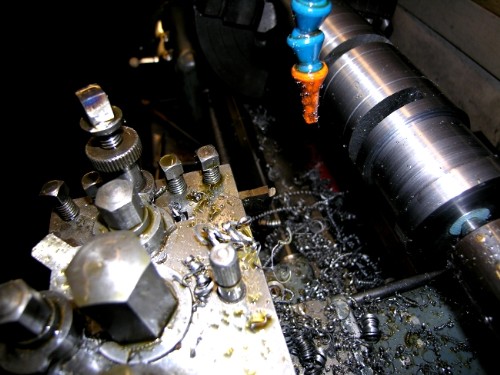
Starting at the outboard end (not a good idea to reduce the other end that is carrying all the drive for the cut) using the guide marks you have scribed, start reducing. Not very clear from this pic but I have changed over to Newtons favourite muck-shifting tool, heavy parting tool with a rounded end with a good rake on it. This will cut both ways and is ideal for heavy cutting in MS. This is tough stuff but is cutting quite well as long as you don't rush it too much. I'm on about 200rpm and depth of cut is adjusted until the cutting oil is just starting to smoke. Don't try to push it, have patience, you have plenty of time!
Stanley Challenger Graham
Barlick View
stanley at barnoldswick.freeserve.co.uk |
Stanley
Local Historian & Old Fart
36804 Posts
|
|
Posted - 06/12/2011 : 07:11
I think you might be able to see the cutter on this pic. When I have it out for sharpening later this morning I'll do a better pic for you.
Stanley Challenger Graham
Barlick View
stanley at barnoldswick.freeserve.co.uk |
Bradders
|
Posted - 06/12/2011 : 22:59
Followed this thread with great interest , and have been waiting for the time when you got to the point where the Crankshafts were to be made....
I am desperate to know how you can machine the journals , with all that eccentric weight loading , from the rest of the component...
I'm really looking forward to the next stages....
BRADDERS BLUESINGER |
Stanley
Local Historian & Old Fart
36804 Posts
|
|
Posted - 07/12/2011 : 05:29
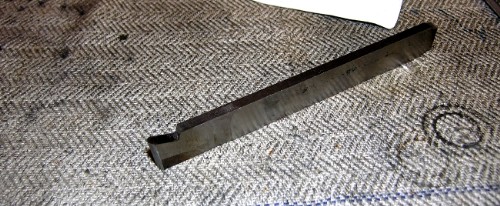
I decided to make a new cutter. I think you can see the idea here. There is no side rake as such because the tool needs to cut both ways. Important thing is to leave the sides alone so they are straight to allow you to get the corners out. I just relieve them a bitbut leave the top edge alone. Get the tip as near a perfect arc as you can. Give it plenty of hook and grind the front face with a relief angle obviously but as straight as you can get it. If you get it right it's amazing what a rub with a fine flat stone round the tip on that face can do. Johnny Pickles was always touching his tool up but Newton never bothered. I got set up and did a couple of cuts but because I had a couple of small domestic jobs to do I was late into the shed and so in affect nothing was done.
Brad. Thanks for commenting, nice to know someone is watching. Don't worry about unbalanced weight when we have to maunt the shaft eccentric to cut the journals. By that time much of the shaft will be cut to 1/2" diameter and the weight will be reduced. Besides, I shan't be doing high speed turning! That is where the advantage of milling all that meat out will become obvious.
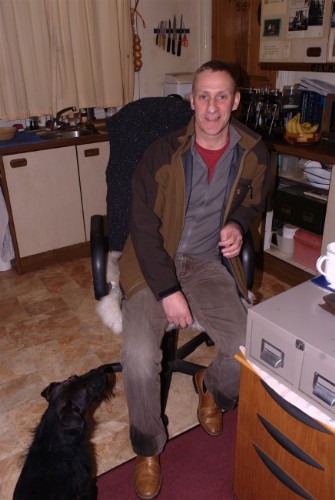
I had a Geordie in the shed yesterday, Mick McAbe paid a visit to check up on me. Notice that Jack is keeping him under close observation! We had a good couple of hours and he was telling me about the current work he is doing to get his machines up to scratch. He has a Harrison as well! He reminds me of myself thirty years ago, I have an idea there's an engineer inside him fighting to get out!
Mick, it struck me that if you were to get a lump of steel big enough to get the T&C grinder bed out of, you could bring it down here and slab it out on the HM. It would be well worth the trip because you would get one of your biggest problems out of the way in one day. Give it some thought....
Stanley Challenger Graham
Barlick View
stanley at barnoldswick.freeserve.co.uk |
Stanley
Local Historian & Old Fart
36804 Posts
|
|
Posted - 08/12/2011 : 06:10
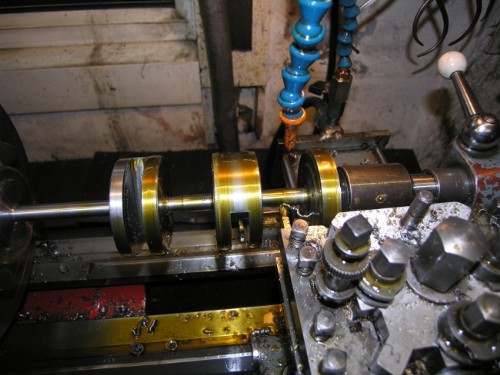
We made progress yesterday!
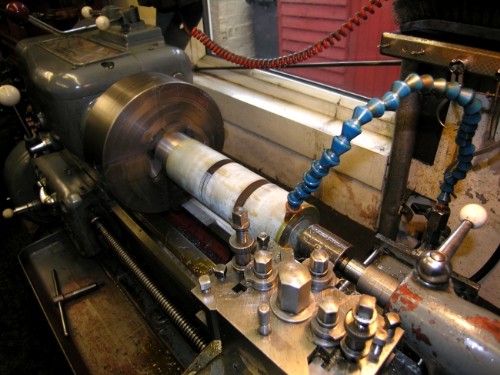
Took it down to about 5/8", finished size is 1/2". Best to leave the final sizing until youcan get your head into precision mode, today's exercise is muck-shifting. The most metal off in the shortest time working safely. Sloed spindle to 117rpm to stop oil flying too much.
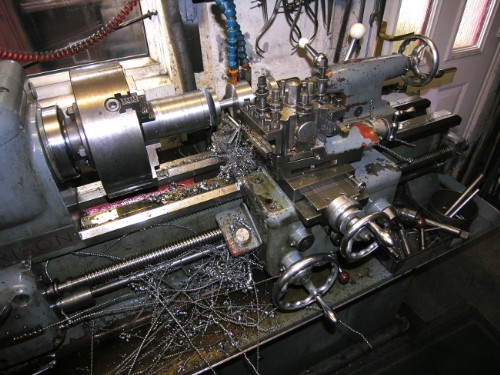
Second shaft section down to 5/8". This isn't all the swarf from this cut, keep clearing it out regularly. Nothing stops production quicker than the chuck picking up the swarf and throwing it in your face! No shame in keeping tidy!
Close of play, ready for the longest bit of shaft at the LP end. Swarf cleared out, oil draining into the sump, ready for another spell of muck-shifting tomorrow. Cleanliness is next to dirtyness!
Brad. not long till the journals now but notice that weight is being removed!
Stanley Challenger Graham
Barlick View
stanley at barnoldswick.freeserve.co.uk |
Stanley
Local Historian & Old Fart
36804 Posts
|
|
Posted - 09/12/2011 : 05:03
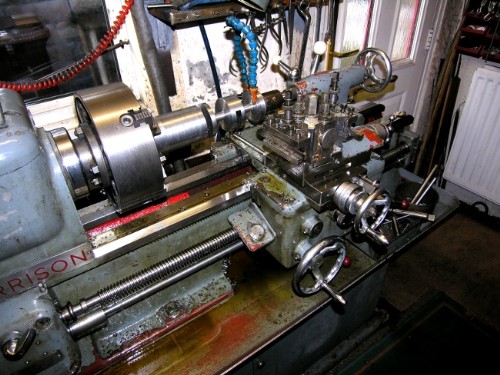
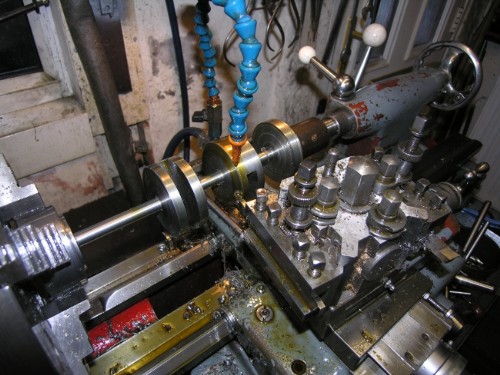
Started the longer cut near the chuck and forgot something I learn every time I make cshafts. If you cut towards the chuck the swarf is thrown into the chuck and it grabs it and you get a snarl up. Cure is to cut towards the tail stock. Another problem was that because I am applying oil so close to the chuck it is picking it up and throwing it at me. Cure was to drop speed to 75rpm. This doesn't slow down muck-shifting because you take deeper cuts. Brew up, head down, get the swarf bin in the shed and keep taking long pieces of swarf off as they form, get cutting!
I remembered a story that Newton once told me about him and Jim Fort working next to each other and having competitions to see who could send the longest ribbon of swarf out through the open door and down the yard!
The more sharp eyed amongst you will see that this is a fine cut. It is taking the shaft down to finished size and finish. Says something for the cutter, I went straight to this cut from the muck-shifting without touching the cutter up. I stopped here but tomorrow will work my way up the shaft doing the same to the other sections of shaft, putting the finishing cut on the faces of the crank webs and reducing the thickness of the webs. I have had a look and the 3/8" thickness on the drawings is going to be tight in the apertures in the engine beds. A strong 1/4" will be plenty because you'll find I leave the discs intact, no need to make shaped webs for balance weights, they run just as well with a disc crank. No loss of strength either.
As I finished I noted that the oil reservoir in the bed was full so I drained it and returned the oil to the header tank. I brushed the standing oil into the reservoir and cleaned the thick of the swarf off the tray. Nice clean start for tomorrow. We're getting along nicely......
I have a bit of Jeye's fluid in the cutting oil as a disinfectant and as I sat watching TV I realised that I had engineer's after shave, cutting oil and pipe smoke. My kids always loved the way I smelled when I was running the engine at Bancroft. If they could bottle it it would be a winner!
Stanley Challenger Graham
Barlick View
stanley at barnoldswick.freeserve.co.uk |
Stanley
Local Historian & Old Fart
36804 Posts
|
|
Posted - 10/12/2011 : 05:44
Hard luck Lads! Too many household duties and new stove related tasks yesterday. I could have had an hour but thought bugger it, I shall have a day off!
Fear not, I shall be back in there today!
Stanley Challenger Graham
Barlick View
stanley at barnoldswick.freeserve.co.uk |
Stanley
Local Historian & Old Fart
36804 Posts
|
|
Posted - 11/12/2011 : 07:07
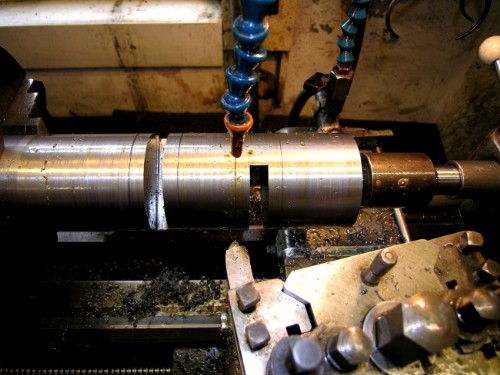
Back in there as promised. Continued reducing shaft to finished size. Look at the middle one and you'll see I made a mistake and cut too deep! Got back to 1/2" and it will be OK because most of the unintended reduction will not be in the bearing but even so, a fault caused by lack of concentration. (Bum Fitters!) Last section OK!
Clean face put on inside surfaces of the crank webs and reduced overall width from 1 1/4" to 1 1/8" just to make sure I had enough room in the bed.
Reversed shaft in lathe, still very accurate centre thank you! Faced the outside periphery of the webs and ran into trouble with the harmonics of the gear drive transmitting into the shaft and because of the thin centre section being allowed to develop. Interesting to note that this wouldn't be a problem on a belt driven lathe. The reason I needed a face was because I was careless while muck-shifting and marked the faces with the tool post. I shall not do this on the next one!
I shall take a view and check but I think I am at the point where I shift to journal centres and get set up for the eccentric turning of the crank journals. See you later! PS don't be worried about the lumps on each end, we shall deal with those later!
Stanley Challenger Graham
Barlick View
stanley at barnoldswick.freeserve.co.uk |
Stanley
Local Historian & Old Fart
36804 Posts
|
|
Posted - 12/12/2011 : 05:16
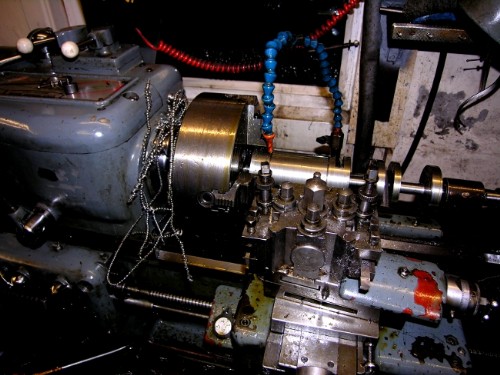
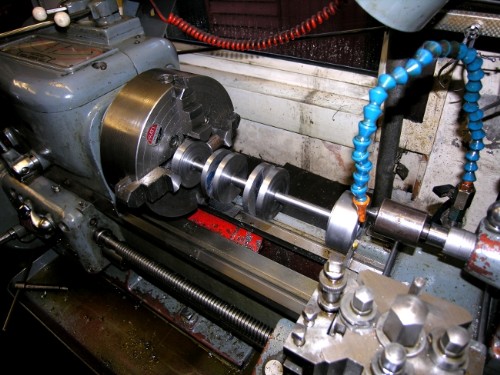
Good start to the day, we have a shaft ready for eccentric cutting of the crank journals.
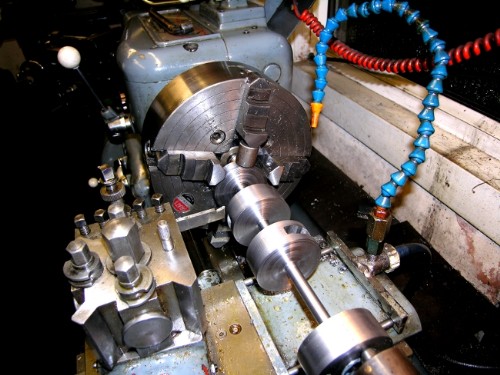
The set up. The spacer under the chuck jaw is needed because the jaw fouls the centre before gripping. Note the overhang on the cutter necessary to clear the eccentricity. Scary stuff! Started cutting......
I didn't cut for long before I realised I was making a bee's knees of it. I wasn't getting into the corners, too much side thrust on the tool and it was obvious something had to be done! If you remember I said that on previous shafts I had taken sides out of the milled cut in the shaft and decided I had to do this to get more metal out of the cut. When I have done both shafts I shall get back into the lathe but with a modified tool shape that won't put side thrust on the cutter, more like a parting tool. No sweat, these things happen and better to go the long way round than have a smash! Slow but sure!
Stanley Challenger Graham
Barlick View
stanley at barnoldswick.freeserve.co.uk |
Stanley
Local Historian & Old Fart
36804 Posts
|
|
Posted - 13/12/2011 : 05:58
Askers mailed me yesterday and asked why I didn't mill the journals using a set up on the VM. Too complicated for me, I am going for the way I feel most confident in.
First cut done on the current shaft, a lot of metal has gone and after all that's the name of the game.
Set up for the second journal. I know it's boring cutting slowly away but quicker and safer than interrupted cuts.
Journals reduced and shaft back in the lathe ready for turning. I shall reduce the second billet before starting on this one and will make a modified tool that will be free from side thrust.
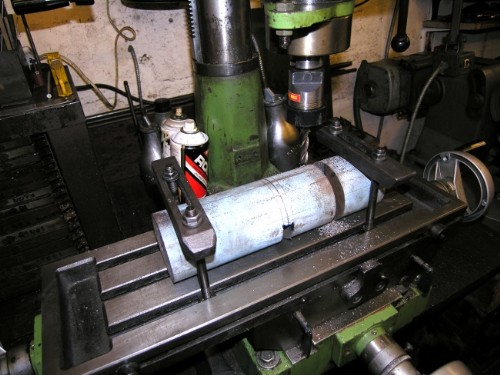
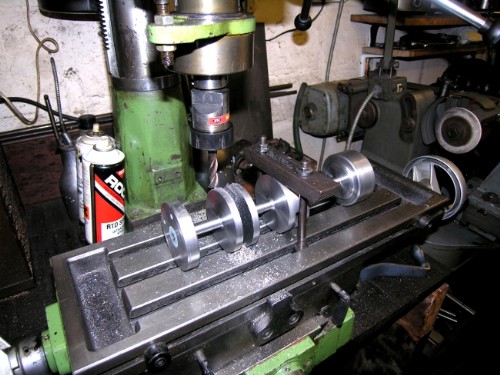
Close of play. The second billet under the VM and cutting started. I should have done this when I was first taking the metal out with the saw and the miller but no matter, no time wasted apsrt from the half hour I did in the lathe which convinced me I was on the wrong track. At this stage the main thing is to get the cutting in the lathe down to a minimum and as safe as possible. The crankshaft on 1/2" central shaft is quite a delicate object. (I have a spare billet just in case!)
Right, you know what I'm doing today! Quietly away....
Stanley Challenger Graham
Barlick View
stanley at barnoldswick.freeserve.co.uk |
Stanley
Local Historian & Old Fart
36804 Posts
|
|
Posted - 14/12/2011 : 07:35
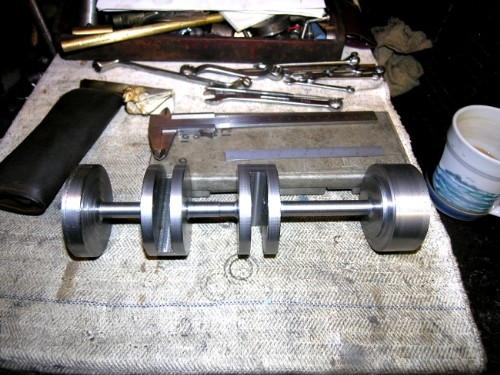
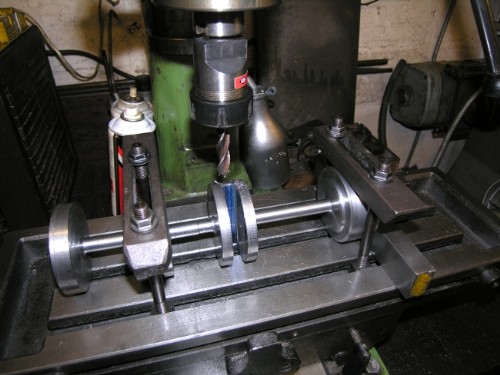
Not a lot of interest to report. This was close of play yesterday, the second billet milled out ready for shaving. Attention will shift to the shaft in the lathe. New cutter needed first.....
Stanley Challenger Graham
Barlick View
stanley at barnoldswick.freeserve.co.uk |
Stanley
Local Historian & Old Fart
36804 Posts
|
|
Posted - 15/12/2011 : 05:37
One of my strict rules is that I never hide my mistakes, nobody is perfect and it's only by making mistakes that we improve. Having said that, I believe I have admitted to being a Bum Fitter and also an Old Fart! Read on and have a good laugh at my expense.

I started the day well enough. Re-sharpened the cutter to give it less side thrust when cutting the corners out and started cutting. Stll not satisfied by the fact that I was getting a jatter in the cut but pressed on for a while. Then a terrible thought struck me and I stopped to have an investigation.
I did right to stop! Has anyone seen the basic mistake? When I set the shaft up in the lathe I decided to cut the journal closest to the chuck so I got the best chance of a good cut while I sorted the cutter form out, I knew I was going to have to make some modifications. Problem was that this was the wrong journal for the set up! I think I stopped in time and it will clean up to 1/2" diameter, if it doesn't I shall reduce it till it is a good surface and make a smaller bronze bearing on the big end of the con-rod. How the hell did I miss that! As you'll see in the pic I have moved operations to the correct journal!
At the same time I remembered what my cure for the cutter shape had been on the other shafts I have made, The jatter in the cut is caused by too much contact across the face of the cutter, just like the problem with a parting tool and made worse by the interrupted cut.

Here's a fag packet sketch. The amount of hook on the tool isn't exaggerated, give it as much as you can get away with. The real trick is to gash the leading edge so that in effect you have two cutters on one edge, one for the left hand shoulder and one for the right. As long as the journal is wide enough one or the other will give you a clean face.
It worked just as it has before. No jatter, much cleaner cut and much improved clean up in the shoulders. I am back on track and we shall see some progress now!
Bottom line is that you can't do too much checking and it helps if you remember what you did last time!
Stanley Challenger Graham
Barlick View
stanley at barnoldswick.freeserve.co.uk |


