| Author |
 Topic Topic  |
|
Stanley
Local Historian & Old Fart


36804 Posts

|
|
 Posted -
25/11/2004
:
14:20 Posted -
25/11/2004
:
14:20
|
I've always been fascinated by the things people do in their spare time when they can do exactly what they want to do. Men and sheds are a particularly fertile field. Women tend to do their thing in the comfort of the house.
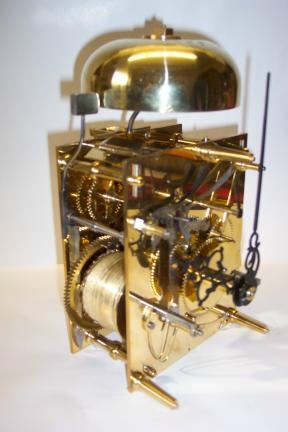
I was delighted to see Andy's picture of the clock movement he has made.
It struck me that we could perhaps start a new topic devoted to spare time skill. So Andy starts it off and my contribution is this:
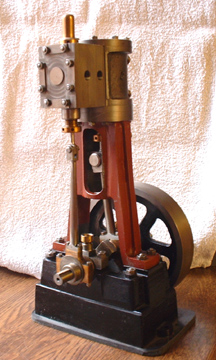
It's a small steam engine made from scratch and is based on the Stuart 5A but a longer stroke. One of these will drive a 14 foot boat with steam at 250psi. By the way, we don't like to call them models, it's exactly the same construction and materials as a full size engine, just smaller. So come on out there, let's hear about what you make in your spare time. I reckon we could be in for some surprises!
Stanley Challenger Graham

Barlick View
stanley at barnoldswick.freeserve.co.uk
|
|
| Replies |
| Author |
|
|
Steve48
New Member

19 Posts
|
|
Posted - 23/07/2007 : 19:32
Very impressive Stanley, I must ask though have you got a some secret store of materials tucked away, you seem to be able to drag lumps od cast iron out of thin air, and just the right size as well.
I think it would be unfair of me to fill up your web site with photos, I will reserve the pleasure for the odd one, anything thats a bit over the top can go on mine, and I will post a link for anyone interested. Talking of which, I surprised myself today by actually restoring some Male stepped chuck collets that were so badly strained I though they were fit for the bin, which indeed they would have been if this machine wasnt an antique and parts totally obsolete.
For anyone interested the link to my exploits with the third Lorch I have procurred and how I fixed the collets is here:-
http://www.workshopman.co.uk/uphill_and_son/pages/engineering/machinery/lorch%20schmidt/restoration%201.htm
And yep, I did see the transition pieces and the slighly shorter big bore.........
Steve
 |
Stanley
Local Historian & Old Fart
36804 Posts
|
|
Posted - 24/07/2007 : 03:49
This is not my web site, it's Docs and this topic is for anyone's shed so post as many pics as you like. Well done for observation. Are you watching this Dave?
Stanley Challenger Graham
Barlick View
stanley at barnoldswick.freeserve.co.uk |
Stanley
Local Historian & Old Fart
36804 Posts
|
|
Posted - 24/07/2007 : 03:52
PS. I always pick handy bits of metal up as I pass them. They come in handy in the end. One of these days I'll have to buy some material and it will break my heart!
Stanley Challenger Graham
Barlick View
stanley at barnoldswick.freeserve.co.uk |
softsuvner
|
Posted - 24/07/2007 : 14:13
The boss of a small engineering works once said, more in wonder than in anger:
"Old engineers never die, they just keep coming back and rummaging through my skips!"
|
Steve48
New Member
19 Posts
|
|
Posted - 24/07/2007 : 14:49
How true is that been doing it myself this morning............... needed a piece of 4.5 inch round, got more than I needed in the end.
Steve
|
Stanley
Local Historian & Old Fart
36804 Posts
|
|
Posted - 24/07/2007 : 18:17
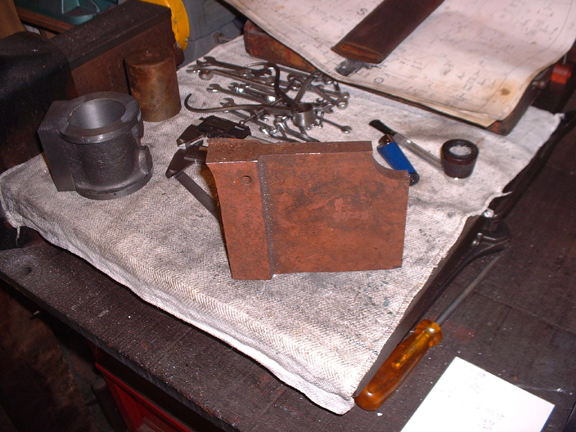
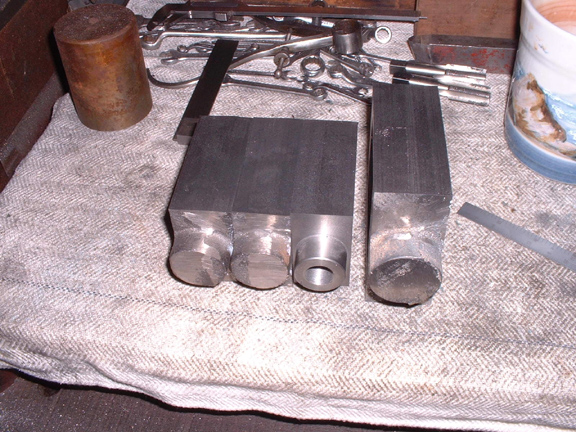
Here's the lump of cast that is going to be the foundation ring for the Mersey tunnel. Rusty and hard as hell but it did the job in the end.
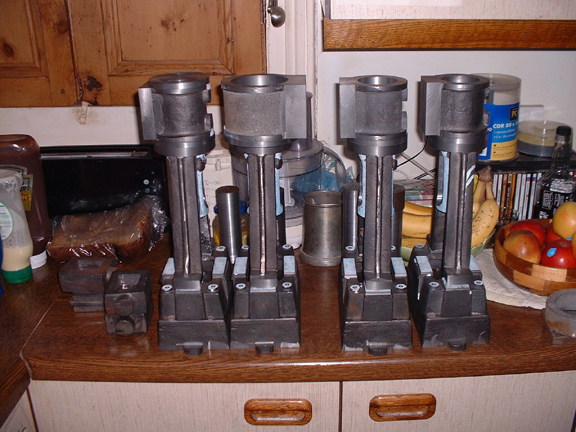
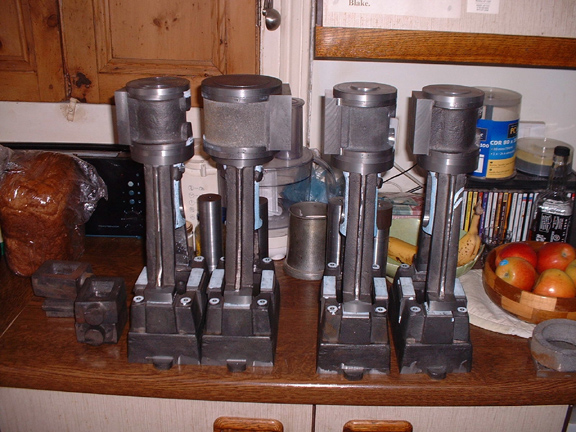
Here's the line up. All of them have their foundation rings bored for the gland and threaded with registers and PCDs marked. The one on the left has it's top lid as well. I cheated with that. I found a blowhole as I was finishing the top face so I turned it over and put the blowhole inside....... It'll be in the dark there.....
Stanley Challenger Graham
Barlick View
stanley at barnoldswick.freeserve.co.uk |
Stanley
Local Historian & Old Fart
36804 Posts
|
|
Posted - 26/07/2007 : 05:51
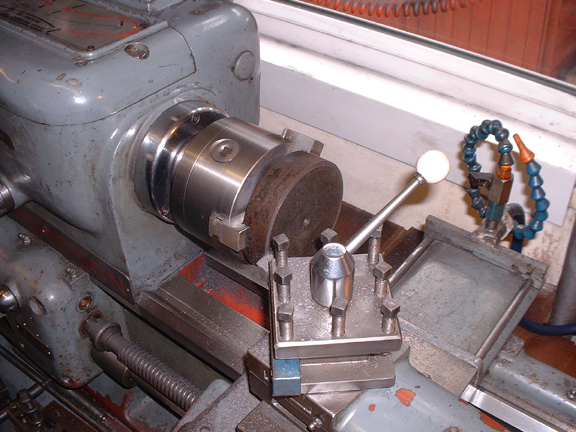
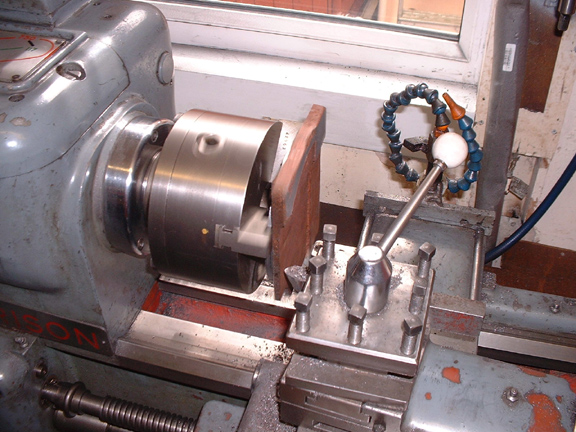
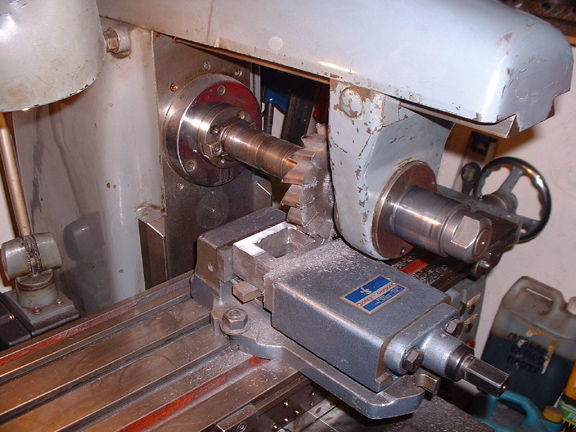
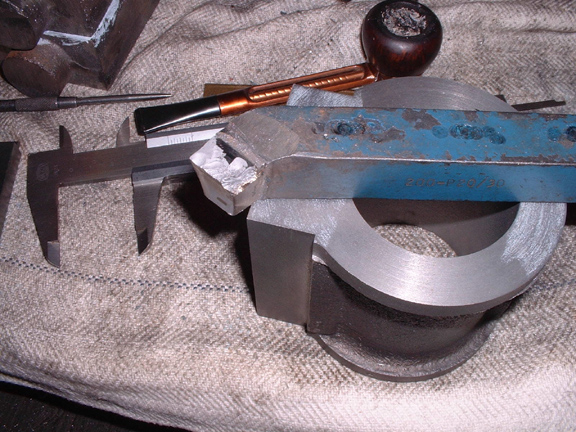
It's been a day of lids..... Newton's made patterns that had a good boss on them so you could get hold of them in the chuck. Very handy so I got on with making the three lids for the original size cylinders. No fancy turning, find a face and a correctly siked edge, put a shallow register on for the bore, turn over, take the boss off face and put a PCD on for the holding down studs at 2 15/16" diameter. Then came the problem of the lid for the Mersey Tunnel...., no casting. So a furtle in the stock pile produced this...
Remember what I said about never passing up a nice bit of scrap? I was in a scrap yard once in Keighlry and saw a cast iron cistern. Ten minutes with a Skilsaw gave me four handy lumps. I was after the thick bits actually but here's one of the pieces and I can get a 5" circle 1/2" thick out of it. That will do....
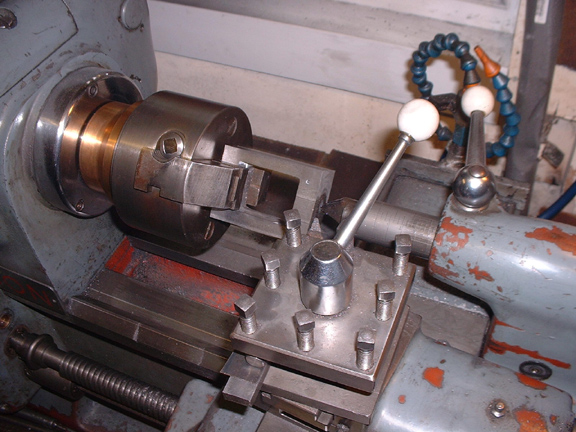
Grab it any way you can and go looking for a face. Find the circle, turn a register deep enough to go into the external jaws on the old Pratt three jaw SC chuck and you're in business. Nice iron but a bit hard.
Find the other face, trepan the circle out and finish turn the lid. Slow and nasty cuts but it solves the problem.
Stanley Challenger Graham
Barlick View
stanley at barnoldswick.freeserve.co.uk |
Stanley
Local Historian & Old Fart
36804 Posts
|
|
Posted - 26/07/2007 : 05:53
Here is the line-up last night. All the lids fitted. Today we move on to the valve boxes and lids....
Stanley Challenger Graham
Barlick View
stanley at barnoldswick.freeserve.co.uk |
Steve48
New Member
19 Posts
|
|
Posted - 26/07/2007 : 07:57
Small world isnt it Stanley. Yesterday I was doing the exact same thing trepanning a circle 4.5 inches out of in my case a piece of black steel 5x6 by 3/4 thick. This to make a matching base to my Lorch for the countershaft pedestal. As you say slow tedious and not without its difficulties. That bit is almost finished, but no photos yet sorry.
Why steel, because that is what the column will be made of, and I want the two to look like one when assembled.
Steve
|
Stanley
Local Historian & Old Fart
36804 Posts
|
|
Posted - 26/07/2007 : 16:55
Nice thing about CI is that when you are somewhere near you can just tap it with the hammer and it will crack off. I've been on the valve boxes today, I'll post the pics in the morning when the site is quiet, much faster......
Stanley Challenger Graham
Barlick View
stanley at barnoldswick.freeserve.co.uk |
Stanley
Local Historian & Old Fart
36804 Posts
|
|
Posted - 27/07/2007 : 05:33
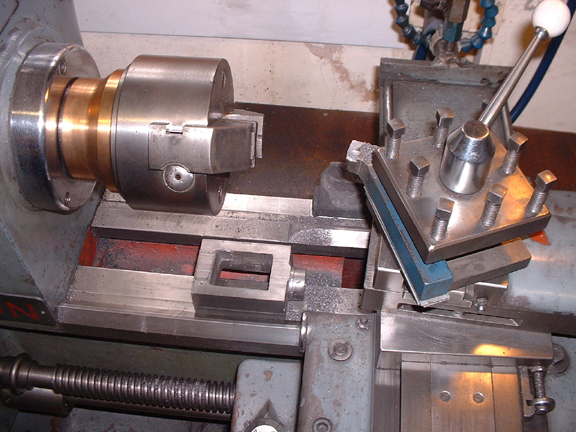
The valve boxes are awkward little sods, none of the castings have anything square about them and every surface has to be made square and a match fo its cylinder. First job was to put them all through the miller and find two parallel surfaces that leave enough meat for the other dimensions after they have been cut. Not as easy as it looks because all the castings are tight. Then the other two sides were cut. By Letcliffe time they had all been done.
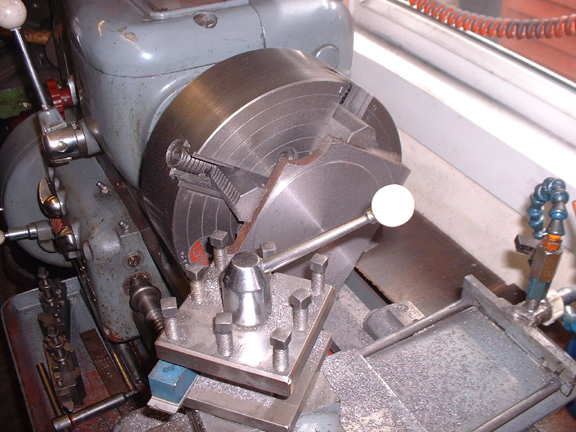
Then number one was put in the two jaw brass finishing chuck and the top end turned off square.
Stanley Challenger Graham
Barlick View
stanley at barnoldswick.freeserve.co.uk |
Stanley
Local Historian & Old Fart
36804 Posts
|
|
Posted - 27/07/2007 : 05:47
All went well and I got to the stage where I could turn the casting end to end, square it up and start cutting the boss for the gland and the bottom face. So far so good, I took the first three cuts down the boss being very careful because this is not a rugged set-up.
Then the bad news, it happens to all of us at one time or another.... The tool grabbed half way down the cut and shattered and the casting was ripped out of the two jaw. Almost every face on the valve box is damaged but I can retrieve that, it won't be as beautiful as it was but quite acceptable. Thing is, why did it happen? One contributing factor is that the two jaw isn't a very powerful chuck and it doesn't have the hold a normal chuck has but even that shouldn't have caused the smash. I was on the slowest auto feed and so it wasn't a grab on my part. A bit of a puzzle.
Here's the Wimet after the smash. I've never seen a tipped tool break like this before. I can't be sure but I think there must have been a hard shop in the casting, very common in small castings as they can easily take a chill when they are poured. It looks to me as though the tip could have been flawed due to repeated sharpening and I've probably had it too hot. I have the definite impression that it was the tool that shattered first but of course I can't be sure because it all happened so fast. Whatever...... I shall have to do some draw filing and perhaps a couple of light skims in the miller and then finish the casting off. It's no big problem, just annoying. I could use the four jaw and get a much firmer grip on the castings from now on. Just a little set-back! Onward and upwards!
Stanley Challenger Graham
Barlick View
stanley at barnoldswick.freeserve.co.uk |
Stanley
Local Historian & Old Fart
36804 Posts
|
|
Posted - 27/07/2007 : 19:33
Good day today. I rescued the battered valve chest and started with an entirely new set-up, I'll post the pics tomorrow. I got me slab mill out and sharpened it, got the engle wrong first time but did it again and it's a much better finish than the cutter I was using. Wide enough to do two small chests at once and a lovely finish so I skimmed the battered one as well. I'll post in the morning when it's easier to put pics up.
News from the electric motor hospital today. The 1/3hp Horace Green is done and healthy again. Bad news is that the 1hp HG failed on the winding. I've asked them to rewind it. Some people might think this is silly because it'll stand me at about £200 by the time it's done but the point for me is that I'll have a unique motor and the one that Johhny bought for the big lathe. It will also be quieter than a modern motor, the laminations are that heavy you don't get the transformer hum that cheap motors have. Besides, it will last forever..... So, I shall shortly have two top class HG motors but a very thin bank balance..... Daft isn't it.
Stanley Challenger Graham
Barlick View
stanley at barnoldswick.freeserve.co.uk |
Stanley
Local Historian & Old Fart
36804 Posts
|
|
Posted - 28/07/2007 : 06:09
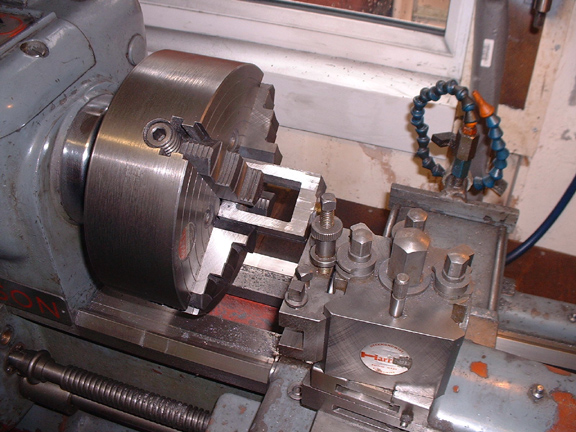
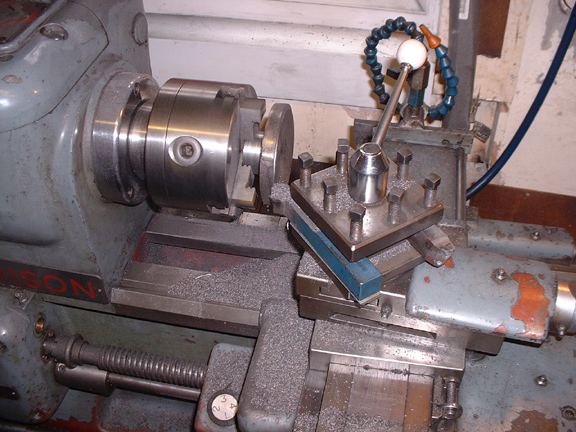
A new set up for the battered valve chest. This is what I should have done in the first place instead of being clever with the two jaw. No problems with finish turning it, drilling it and threading the stuffing box for the gland nut.
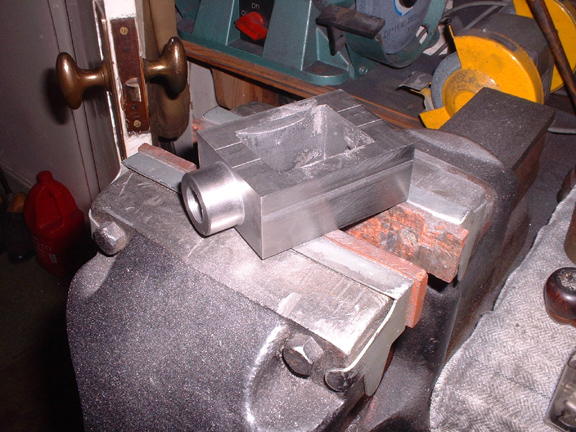
The battered valve chest after the first stage of rescuing it. Notice that I have cleaned up the inside surfaces. They don't need any finish, just clearance for the slide valve itself so the treatment is the sharpest 18" flat file in the box and just rip off the lumps. I always remember what one of Henry Maudsley's men said about him after his death. " It was a pleasure to watch Mr Maudsley using any hand tool but he was particularly fine with an eighteen inch flat file...." Not a bad epitaph.....
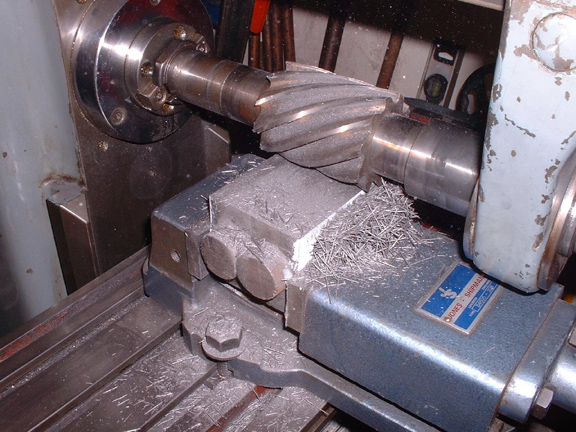
I decided to get me slab milling cutter sharp so I could do the chests in one pass. I got the angle wrong first time but did it again and you can see from the chips that it is performing well. Two chests at once! Cooking with gas.
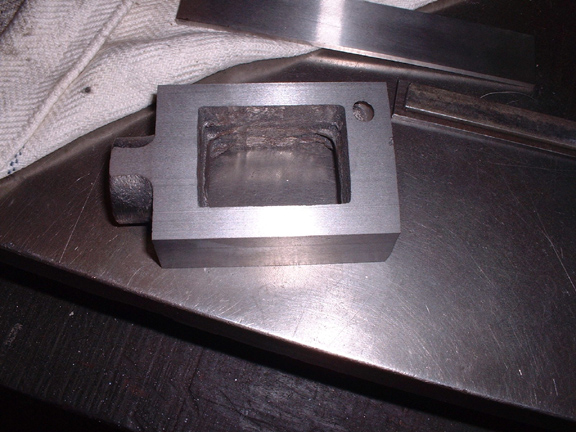
Lovely finish but look what I found, a big gas bubble in the casting. No problem as it hasn't broken out to the surface, I'll find a way round it later.
When I knocked off at 6pm all the chests were ready for the lathe.
Stanley Challenger Graham
Barlick View
stanley at barnoldswick.freeserve.co.uk |
softsuvner
|
Posted - 28/07/2007 : 14:41
Stanley
I'm still amazed at your rate of progress. LBSC's solution for a "blowhole" would be the same as fixing the "wandering drill" syndrome when drilling out steam-passages: drill and tap it, and put a blind stud in. Nowadays there are all sorts of patent concoctions like "Belzona". There is even a new Australian mig-type torch that is suposed to do miracles with difficult materials like cast iron and cast alloys. Now youv'e done the machining, it is probably too late for anything involving heat. Press on!
Malcolm
|


