| Author |
 Topic Topic  |
|
Stanley
Local Historian & Old Fart


36804 Posts

|
|
 Posted -
25/11/2004
:
14:20 Posted -
25/11/2004
:
14:20
|
I've always been fascinated by the things people do in their spare time when they can do exactly what they want to do. Men and sheds are a particularly fertile field. Women tend to do their thing in the comfort of the house.
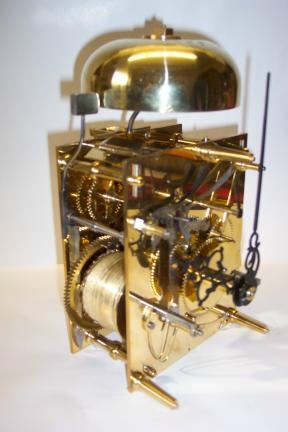
I was delighted to see Andy's picture of the clock movement he has made.
It struck me that we could perhaps start a new topic devoted to spare time skill. So Andy starts it off and my contribution is this:
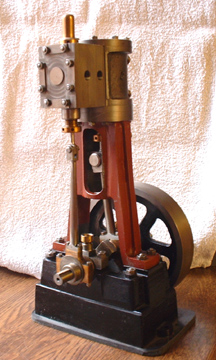
It's a small steam engine made from scratch and is based on the Stuart 5A but a longer stroke. One of these will drive a 14 foot boat with steam at 250psi. By the way, we don't like to call them models, it's exactly the same construction and materials as a full size engine, just smaller. So come on out there, let's hear about what you make in your spare time. I reckon we could be in for some surprises!
Stanley Challenger Graham

Barlick View
stanley at barnoldswick.freeserve.co.uk
|
|
| Replies |
| Author |
|
|
Stanley
Local Historian & Old Fart
36804 Posts
|
|
Posted - 10/08/2007 : 05:18
Yes, so do I and I'm not looking forward to it....... It can be bloody boring and the problem is you go to sleep on the job and make a mistake. Brown and Pickles in Barlick used to make crankshafts for the big three throw pumps they used to make. They chopped them out of a 36"X12" billet of 90 ton steel. It took a good turner over ten days to make one. Jim Fort set out to make one and just as he was finishing he turned off the shoulder for the journal in the driving side bearing! If you ever gop to Bancroft have a look at the big three throw in the cellar and you'll see that they had to make a special bush for the bearing at that end to get over the problem. So easy to do when you're on auto-pilot. Johnny Pickles once turned an engine fly-wheel at Burnley Ironworks. I think it took him six weeks to do the rope grooves.......
Stanley Challenger Graham
Barlick View
stanley at barnoldswick.freeserve.co.uk  |
Stanley
Local Historian & Old Fart
36804 Posts
|
|
Posted - 10/08/2007 : 06:11
I read that and realised there was more to say about crankshafts. Chopping shafts out of the solid is hard on the lathe because you are on heavy interrupted cuts for most of the time. Imagine a small 3" swing lathe with worn headstock bearings and treadle drive.... That was what many amateurs were using when this engine was designed. Stuart eased the job a bit by suggesting 2 1/2" bar and building the counterweight separate and bolting it on but even so, there's a lot of muck to shift. Remember also that I have a Stuart drawing for guidance but non-standard castings because Newton and I made our own. The mistake I made with the first engine was to follow the Stuart dimensions for the shaft and then I had to a lot of fitting to make the shaft fit the bed. I'm older and wiser now and each shaft will be made to suit the existing bearings. Another factor is that I'm a far better fitter now than I was then and I have more confidence in what I'm doing, these shafts will fit the hole! As for the stage where you decide it's time to make the shafts.... I'm sure a lot of builders have made the mistake of making all the parts and then building the engine. This is OK as long as you are talking about making the castings the right shape and dimension and of course that's what I've been doing up to now, getting the muck out of the way. Now I've got into actual fitting of the moving parts and their bearings different rules apply. You have less latitude for deciding on the order of the jobs. It's obvious you don't make the shaft before you have fitted the bearings. You can't fit the standard until you have a shaft in place (in this case a brass bar with a register) because it's essential that it's mounted dead central and square. Once the standard is on the centres for the cylinders and associated parts are all automatic because if you've used your head, you have made registers on all of them. So, at dinnertime yesterday I had a choice, I could start on the crankshafts or fit the standards and I didn't feel like shafts so I decided to make a register that fits all the standards and get the standards fitted. I suppose my reason for that is that it begins to look like an engine if the standards are in place, a bit of a psychological boost. In the case of the double engine there is yet another consideration. I can't make the shaft until I have joined the two beds together and that means I have to join the two box beds. I can't do an accurate measurement until that is done and all the bearings lined up, it will be an advantage of they are all in a straight line! So, I shall fit all the standards. Poke a 3/4" bar through all four bearings and then do some marking up and measuring. I shall have to mill the sides of the box beds square and bolt them together using a spacing plate. Once I have done that I can get accurate measurements for the double shaft. Once the shafts are fitted I'll mount all the sole plates on their box beds, make the con rods and bearings, fit them. Make the piston rods and fit them to the connecting rod and than decide on the length of the rod while it's in place. I'll have to do all the suds etc for fitting the cylinders, register plates and top lids at some stage and all I can say is that these will be done before I make the pistons and fit them. You might think this is all a bit complicated but the more you think about the oder of build the easier it gets because you're avoiding mistakes. Enough talking.... I shall walk Jack, do the shopping and get back in the shed!
Stanley Challenger Graham
Barlick View
stanley at barnoldswick.freeserve.co.uk |
pluggy
|
Posted - 10/08/2007 : 23:33
In all the steam plant I worked on, everything that rotated was turbine, the reciprocating stuff drove reciprocating pumps. Crankshafts didn't enter into the equation. 
That was the domain of my passion - diesel engines.......
Need computer work ?
"http://www.stsr.co.uk" 
Pluggy's Household Monitor |
Stanley
Local Historian & Old Fart
36804 Posts
|
|
Posted - 11/08/2007 : 05:24
Diesels are steam engines that make their own steam.... I worked on 'em all my life. Nowt wrong with diesels....
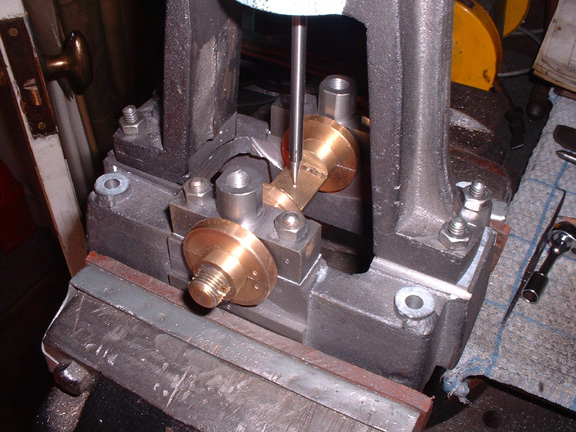
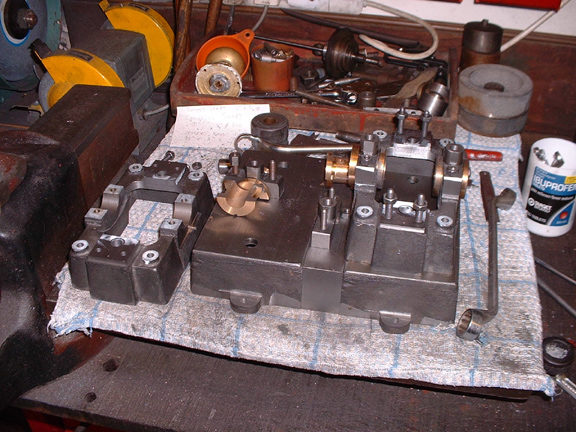
Here's the dummy crankshaft and register doing its job. Yesterday was a bull day. It took me all morning to do the first standard to my satisfaction but then I got into my stride and by 6 last night (an hour of overtime!) this was the line-up. All the standards fitted. They're beginning to show signs of being engines.....
Stanley Challenger Graham
Barlick View
stanley at barnoldswick.freeserve.co.uk |
Stanley
Local Historian & Old Fart
36804 Posts
|
|
Posted - 11/08/2007 : 16:32
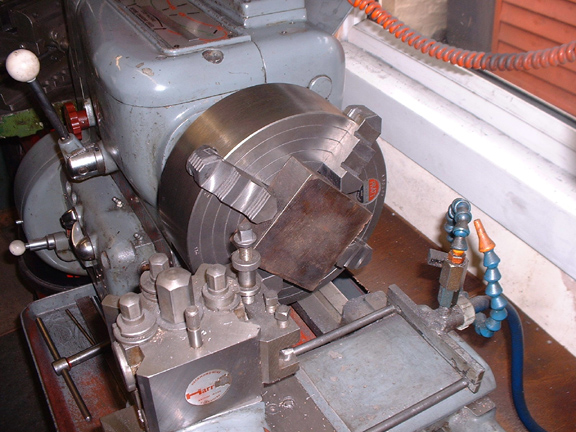
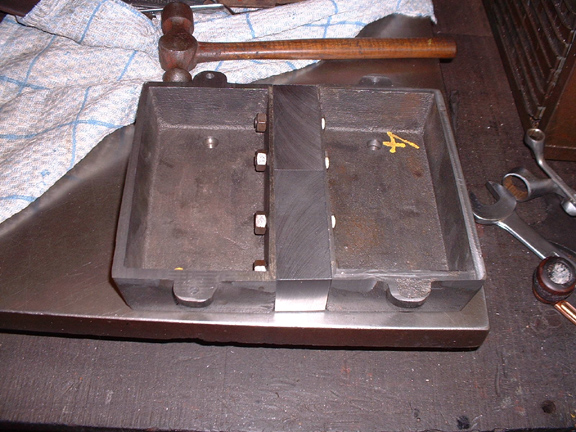
What's he up to now? I need a piece of steel 1 1/2" thik by 2" by 7 1/2 inches. Of course I haven't got one but I do have a piece of steel 4" square and 1 1/2" thick. So, get it square and bright in the lathe and then......
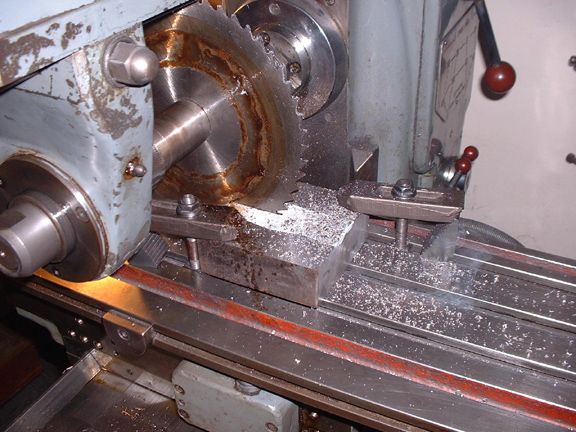
Slit it down the middle. At times like this the 8" by 1/8" slitting saw is a lifesaver!
A heavier saw so it won't flex and some radical surgery on the beds. The two matching surfaces need to be square and clean.
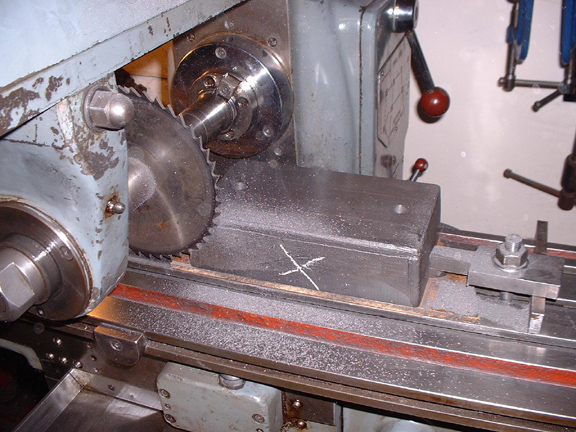
Here we are. Some trimming needed on the spacer and then some bolt holes and accurate marking out tomorrow and we can fasten the whole lot together to make the bed for the compound. Newton had a new bed cast for his but I haven't got access to the patterns or the foundry and besides, this will be just as good.
Stanley Challenger Graham
Barlick View
stanley at barnoldswick.freeserve.co.uk |
Stanley
Local Historian & Old Fart
36804 Posts
|
|
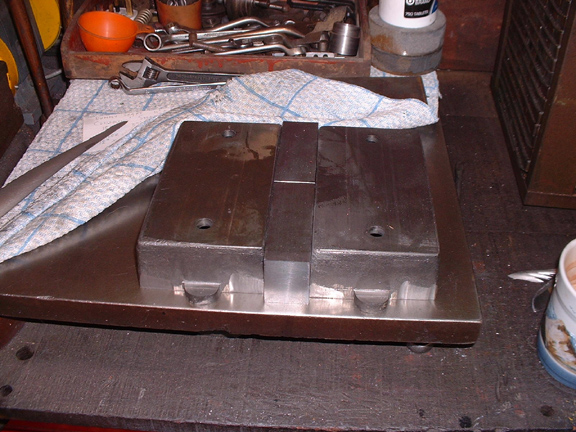
Posted - 12/08/2007 : 15:59
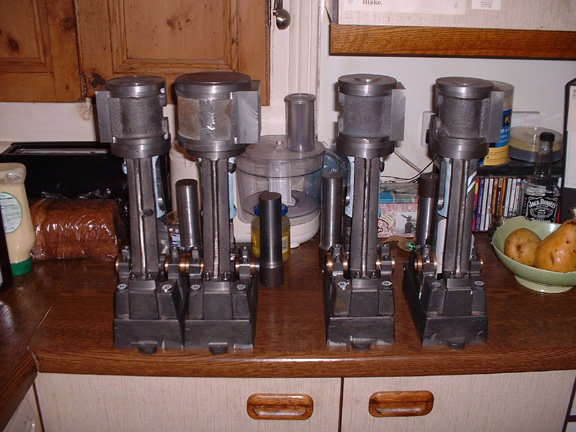
A bit of trimming on the spacer blocks and four 3/8 Whit bolts and we have a bed for the compound engine.
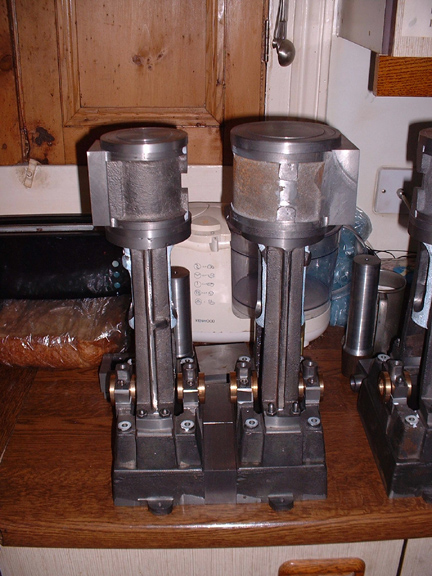
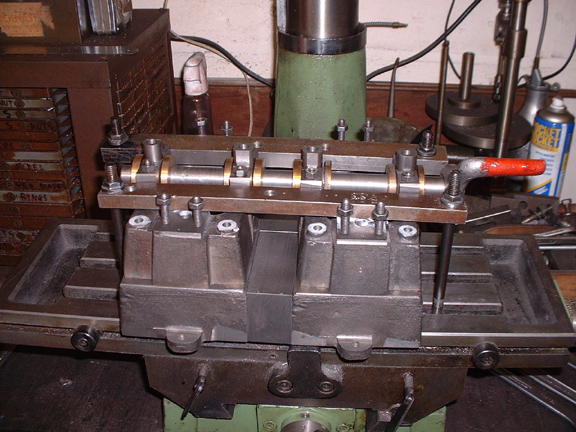
Here are the two engines sat on the common bed. It's suddenly become one engine. The gap between the two engines makes it look better, gives room for the bearings and adjusting them and I have a fancy to install a split eccentric and use it as a drive for a boiler or condensate pump, we shall see. The main thing is that the possibiity is there.
Stanley Challenger Graham
Barlick View
stanley at barnoldswick.freeserve.co.uk |
Stanley
Local Historian & Old Fart
36804 Posts
|
|
Posted - 13/08/2007 : 07:13
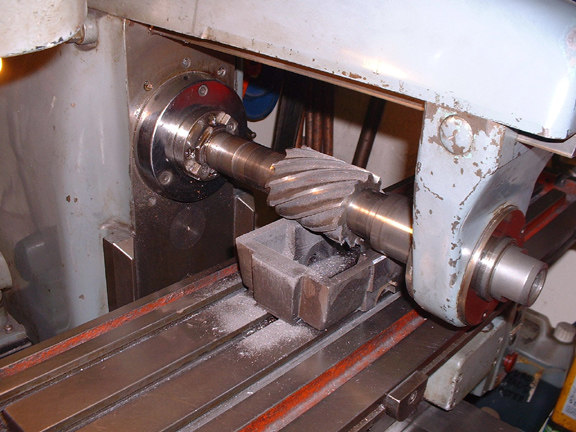
I'm going to ring a mate this morning. I need 15" of 3" bar for the crankshaft.............
Stanley Challenger Graham
Barlick View
stanley at barnoldswick.freeserve.co.uk |
Stanley
Local Historian & Old Fart
36804 Posts
|
|
Posted - 13/08/2007 : 16:15
One or two non-shed tasks to do today so it was after dinner before I even thought about the shed. Didn't feel too energetic so I did one or two small tasks and then set the two halves of the compound up to test the alignment of the bearings.
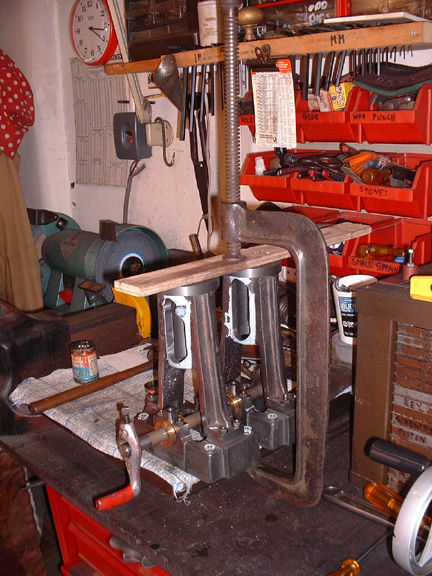
Not bad really, about .005 out perhaps on the LP engine. Remember the bearing caps are dead tight, the discrepancy could be easily cured by slackening a bearing because it is out on height, not lateral alignment. So I cut a piece of 3/4 bar and Ive spent about an hour lapping the bearings with fine valve-grinding paste. Almost there but I got fed up of grafting and decided tomorrow is soon enough. I rand a mate this morning and my piece of 3" bar will be ready for export on Thursday....... Nice!
Stanley Challenger Graham
Barlick View
stanley at barnoldswick.freeserve.co.uk |
Stanley
Local Historian & Old Fart
36804 Posts
|
|
Posted - 14/08/2007 : 07:26
I've been thinking about the difference in heights in the two beds and Im going to do what the old nengine erectors would have done. I don't want to take any more out of the bearings by lapping, I shall do everything I have yet to do to the beds, get them on the surface plate and find out the thickness of shim I need to get them dead level. Then I'll assemle the beds, get them perfect and hopefully they will never be parted again. This way I get my alignment and keep the bearings all the same size. I don't want to be mucking about with varying journal sizes when I make the crankshaft. One thing I have been considering is turning the centre eccentric for the feed pump out of the solid while I make the shaft. Complicates matters a bit but no need for any calculations because it isn't connected to the timing of the valves, it's only driving a pump. This is the reason why the eccentrics for the valves are made loose on the shaft because you have to be able to make fine adjustments to get the best out of the engine.
Stanley Challenger Graham
Barlick View
stanley at barnoldswick.freeserve.co.uk |
pluggy
|
Posted - 14/08/2007 : 11:54
I was going to suggest shimming, Stanley, or possibly shaving a bit off the high bed and maybe adjusting the standard at the other side to keep them level at the top end.
But, whatever, its your project. I'm just a spectator
Need computer work ?
"http://www.stsr.co.uk"
Pluggy's Household Monitor |
Stanley
Local Historian & Old Fart
36804 Posts
|
|
Posted - 14/08/2007 : 18:52
No Pluggy.... the beds are OK it's the boring of the seat for the bearing which is slightly out. Any adjustment of the seat destroys the inegrity of the fit of the pedestal cap and bearing. Far easier to just shim the offending engine up a few thou which is just what the old fitters would have done. Small discrepancies like this are only to be expected, you can't be dead accurate all the time. As for the height of the standard, no way I touch that because that would alter all the internal measurements of the engine. No, it's shims.......
Stanley Challenger Graham
Barlick View
stanley at barnoldswick.freeserve.co.uk |
Stanley
Local Historian & Old Fart
36804 Posts
|
|
Posted - 14/08/2007 : 19:09

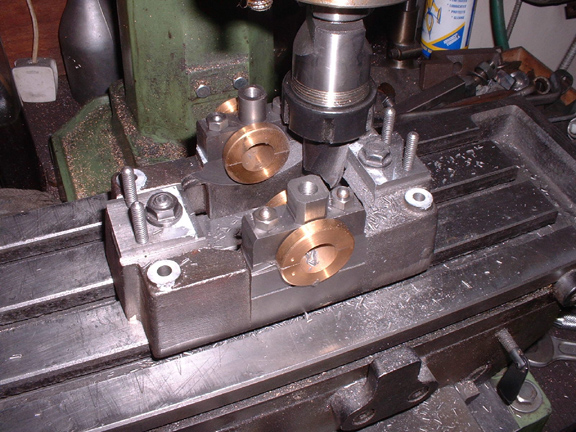
It took me a while to set this lot up but well worth while, not an easy cut and I don't want any accidents at this stage in the proceedings. It took me almost four hours to measure up, decide on the cut and get sorted out. This is the second standard and it took just an hour to bore out. The other two are up for shaving tomorrow. The drawbolt through the mandrel is a good insurance policy and saves overtightening the chuck. No way it can shift.

Here's a close up of the bed with the adjusted standard on it. You can see what needs to be taken out of the inside at the base of the standard to give room for the big end of the con rod. Easy to mark now and a simple milling job on the V miller to get rid of the excess. I always knew I had to do this but it slipped my mind in the rush to get forward. Just a word about finish, you can see the ledge at the top of the cut..... Twenty years ago I'd have spent hours getting rid of this and making it all look 'nice'. Over the years I have learned a lot about engines and the old fitters and they never did any finishing or polishing unless it was on show and necessary. Nowadays I don't think anything looks better than a sharp machined edge and a tool finish. There is absolutely nothing wrong with the rough cast finish and there will be no polishing and mucking about. All that counts is whether the engine is fitted accurately and therefore runs properly. So, tomorrow is boring two standards, milling the beds out to suit, fit the dummy shaft and then shim the bed up to the right level and bolt the beds down to the box bed. Just like that........
Stanley Challenger Graham
Barlick View
stanley at barnoldswick.freeserve.co.uk |
Stanley
Local Historian & Old Fart
36804 Posts
|
|
Posted - 16/08/2007 : 06:29
Good day on Wednesday.... Knocked the two standards off by dinnertime. Milled all four beds out to suit the standards and did some more measuring on the discrepancy in the two beds. I was surprised to see how far out I was. On the surface plate everything is parallel but the no. 3 bed (the LP) is .054shy of bedding. Did the same thing on the combined box beds and found it was .025 due to a small discrepancy in the beds themselves. Gave it a coat of thinking over and decided to take .025 of the high soleplate. So the first thing to do was sharpen a milling cutter....
25 thou coming off the HP bed after stripping it down.
Teatime and we are ready for rebuilding the HP soleplate, making any final adjustments and then marking the box bed up for drilling for the holding down bolts. This will then stay in one piece unless there's something I have forgotten.
Stanley Challenger Graham
Barlick View
stanley at barnoldswick.freeserve.co.uk |
pluggy
|
Posted - 16/08/2007 : 09:26
Hmmm, so much for the beds being OK. 
Sorry Stanley, couldn't resist..................
Need computer work ?
"http://www.stsr.co.uk"
Pluggy's Household Monitor |
Stanley
Local Historian & Old Fart
36804 Posts
|
|
Posted - 17/08/2007 : 05:24
Pluggy, give up! The beds were OK, it was the boring for the seat of the pedestal bearings that was wrong. It would have been a miracle if they had both been exactly the same. On the single engine it doesn't matter but on the double engine it had to be rectified. There were three ways it could have been put right without altering the relationship of the internals of each engine, skim the box beds and shim .054 on the low engine, Shim the low engine .025 or skim the soleplate of the high engine .025 and use a very thin shim to get it dead right, probably about .003. The easiest way was to skime the soleplate.
Here are the two engine soleplates mounted on the box bed and cramped down tight in the optimum position. The shaft is free but a touch tight, a small shim on the LP will cure this. I've got them all assembled and cramped because I want to re-bore the foundation bolt holes in the soleplates to ensure they are dead vertical and spot the box bed for drilling and tapping in the right place for 1/4 Whit studs. Looks like overkill but it ensures they are dead on.
I took a short walk down to my mates at Gissing and Lonsdale and staggered back with 35lbs of 3" shaft..... This will make the crankshaft for the double engine. Another problem solved. I'd just got back with this when a big silly grin appeared at the window..... Doc was back and he took me off to Skipton where we had half an hour in a shop with a lot of different whiskies in it..... I bet Doc that I knew one they wouldn't have, 'As we get it', a whisky bottled by a grocer who supplied the fishing fleets. It is cask strength and they only bottle it when they have an eight year old malt good enough. They had it, and this one is over 60 proof and we tasted it when we got back. Lovely stuff...... So no more shed yesterday! Onwards and upwards today.
Stanley Challenger Graham
Barlick View
stanley at barnoldswick.freeserve.co.uk |


