| Author |
 Topic Topic  |
|
Stanley
Local Historian & Old Fart


36804 Posts

|
|
 Posted -
25/11/2004
:
14:20 Posted -
25/11/2004
:
14:20
|
I've always been fascinated by the things people do in their spare time when they can do exactly what they want to do. Men and sheds are a particularly fertile field. Women tend to do their thing in the comfort of the house.
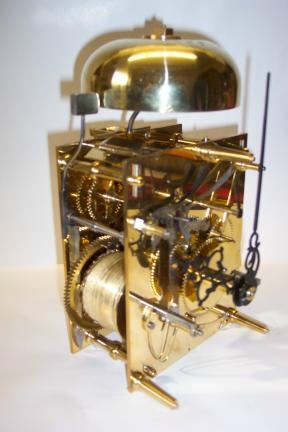
I was delighted to see Andy's picture of the clock movement he has made.
It struck me that we could perhaps start a new topic devoted to spare time skill. So Andy starts it off and my contribution is this:
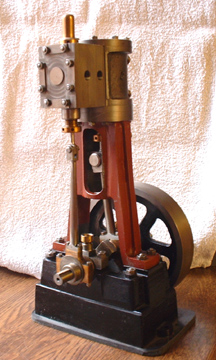
It's a small steam engine made from scratch and is based on the Stuart 5A but a longer stroke. One of these will drive a 14 foot boat with steam at 250psi. By the way, we don't like to call them models, it's exactly the same construction and materials as a full size engine, just smaller. So come on out there, let's hear about what you make in your spare time. I reckon we could be in for some surprises!
Stanley Challenger Graham

Barlick View
stanley at barnoldswick.freeserve.co.uk
|
|
| Replies |
| Author |
|
|
Stanley
Local Historian & Old Fart
36804 Posts
|
|
Posted - 18/09/2007 : 06:11
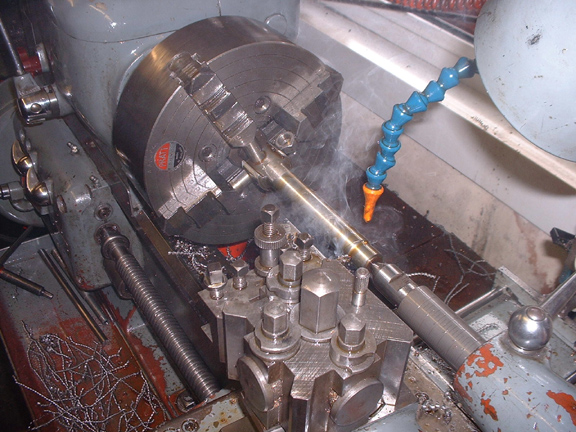
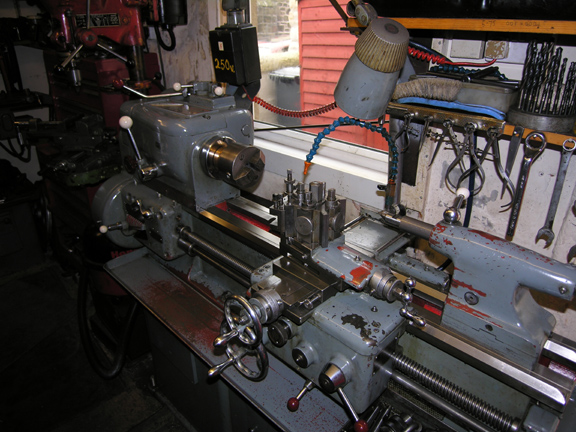
I think I'll stick to old-fashioned boring in the lathe, why alter something that doesn't need fixing? Not too sure about beautiful, I can see all the faults but they are only superficial finish and won't affect the way they run. Individual fitting is the only way until you reach almost perfevt measurement. That's the reason all the old machines were hand fitted, manufacturing tolerances weren't close enough. Only problem I had yesterday was that the boring bar was cutting so quietly I couldn'r hear when it had finished the cut! I had to spot the bar. I'm looking forward to getting the cross-head/piston rods done so I can fit the bottom end. I can't finish the ends of the rods until I have built the top ends up so lots of drilling and tapping coming up!
Stanley Challenger Graham
Barlick View
stanley at barnoldswick.freeserve.co.uk  |
Stanley
Local Historian & Old Fart
36804 Posts
|
|
Posted - 18/09/2007 : 16:24
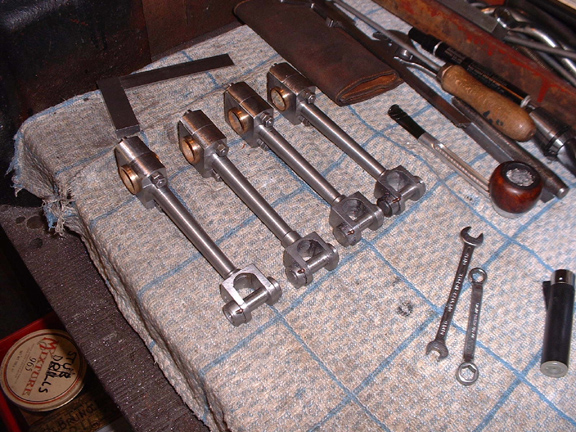
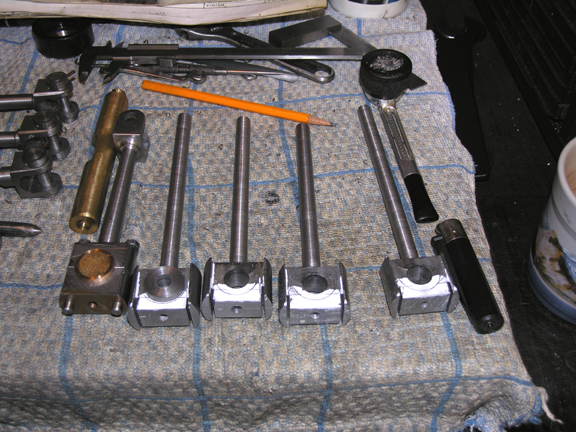
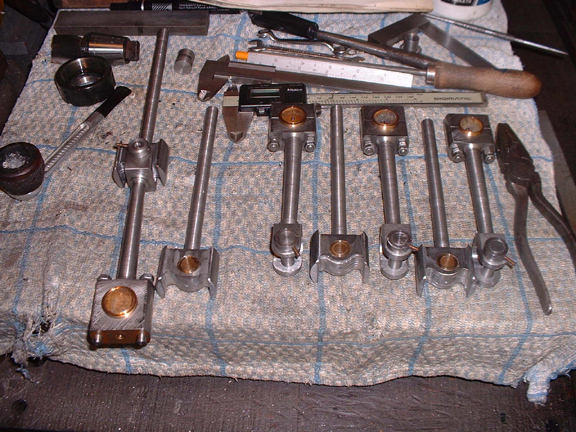
A day of tiddly bits. All the con rods now have crank pins and collars fitted and drilled for the taper pins that will lock the collars on the pins, the best way I have ever found of doing them. Solid fastening and easy to get out if you need a strip down. Driving them home will be one of the last jobs. I had a bit of time left so I took the first cuts on all four crosshead/piston rod blanks. Ready for some serious shaping and drilling tomorrow before I turn the spare meat off the blanks. Not a lot to do on them, they will soon come together. Nowhere near as complicated as the con rods. I have drilled the marine ends for the copper pegs that will locate the bottom half shell but have left the oil hole until I have them in bits next.
Stanley Challenger Graham
Barlick View
stanley at barnoldswick.freeserve.co.uk |
Stanley
Local Historian & Old Fart
36804 Posts
|
|
Posted - 19/09/2007 : 16:46
A very small day's work...... I sharpened a milling cutter, rough cut one crosshead end and after getting soaked walking Jack at dinnertime, had a shower, a good steak sandwich and went to sleep in the armchair! No sweat.......
Stanley Challenger Graham
Barlick View
stanley at barnoldswick.freeserve.co.uk |
Stanley
Local Historian & Old Fart
36804 Posts
|
|
Posted - 20/09/2007 : 05:29
I should confess..... I spent much of the morning trying to understand why I wasn't getting a clean cut with the milling cutter. I have a lot to learn about cutting edge geometry on cutters! I got there in the end but I am fairly sure I went down the wrong route.....
Stanley Challenger Graham
Barlick View
stanley at barnoldswick.freeserve.co.uk |
Stanley
Local Historian & Old Fart
36804 Posts
|
|
Posted - 20/09/2007 : 16:59
All four crosshead blanks are now rough milled out. Next job, turn the piston rods. But that's for tomorrow......
Stanley Challenger Graham
Barlick View
stanley at barnoldswick.freeserve.co.uk |
Stanley
Local Historian & Old Fart
36804 Posts
|
|
Posted - 21/09/2007 : 17:56
Upset day today, shopping, rain and one or two small jobs that needed doing. Raining at dinnertime so Jack missed Letcliffe and moped around so much that when it stopped raining I took him up there and burned him off. In between.....
The worlds biggest catch plate again, worked like a charm, dead centre and a positive grip. Two hours later, after more muck-shifting...
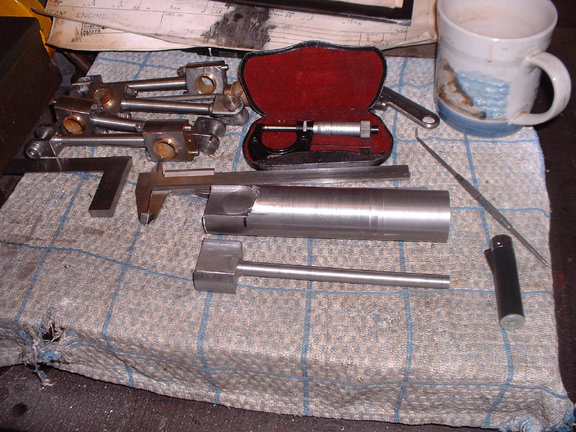
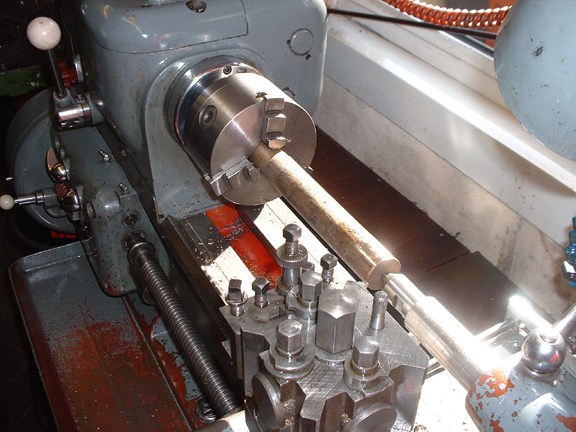
One of the crosshead/piston rods finished and ready for the work on the crosshead for the connecting rod. I'll do the others tomorrow. Yes, you're right, I got serious and got a micrometer out. I apologise. Once I have the con rods connected to the crossheads I'll fit them to the engines and then I can get an accurate measurement for the length of the rods. I could measure it now and finish them off but I'll feel a lot happier measuring them in situ, no slip ups that way......
Stanley Challenger Graham
Barlick View
stanley at barnoldswick.freeserve.co.uk |
Stanley
Local Historian & Old Fart
36804 Posts
|
|
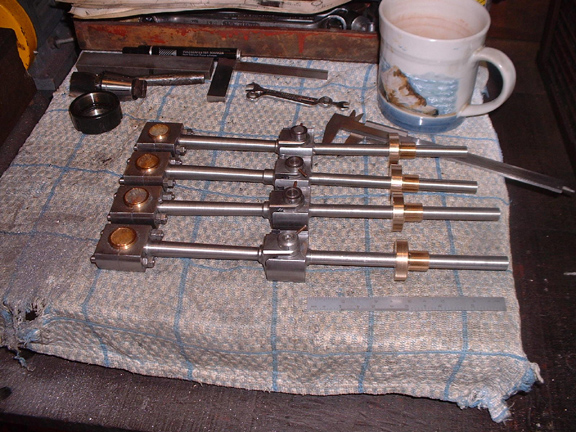
Posted - 22/09/2007 : 15:45
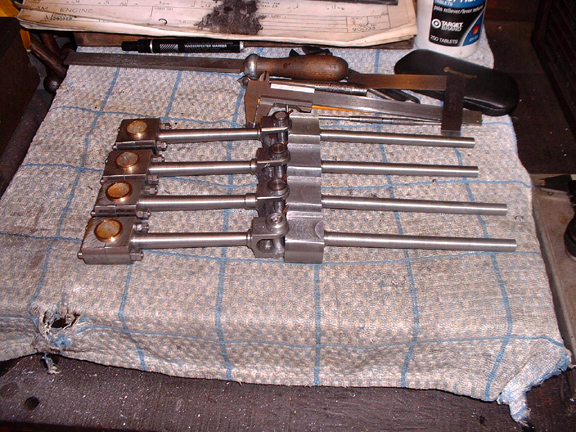
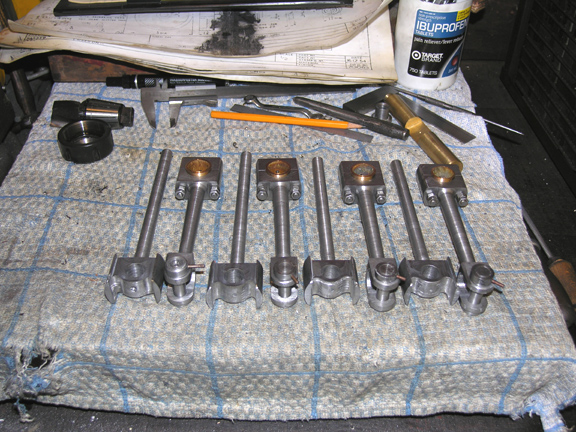
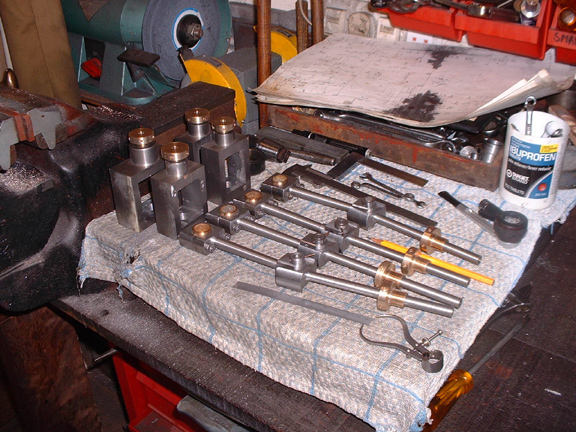
Lovely sight..... all the crossheads/piston rods matched with their respective con rods. We're ready for some concentrated fitting now. Even better, that's the end of serious muck-shifting, the steel turning that's left is tiddly bits and remember that the eccentric rods will come out of the cocked up con rods so not a lot of metal to shift there. Even better still, I can get rid of all the oil on the lathe and have a dry bed for a while. Mind you, it's good for your hands....
Stanley Challenger Graham
Barlick View
stanley at barnoldswick.freeserve.co.uk |
panbiker
|
Posted - 22/09/2007 : 16:30
Nice display Stanley and a lot of work, I knew you would find a use for your previous "mistakes". Enjoy your fitting.
Ian |
Stanley
Local Historian & Old Fart
36804 Posts
|
|
Posted - 23/09/2007 : 06:11
Thanks for that Ian. I'll tell you sommat.... When I get these fitted they will look like engines. There is a lot of work in the crankshafts, con rods and crossheads. More work to do on them yet of course but we shall soon have these in place.
Stanley Challenger Graham
Barlick View
stanley at barnoldswick.freeserve.co.uk |
Stanley
Local Historian & Old Fart
36804 Posts
|
|
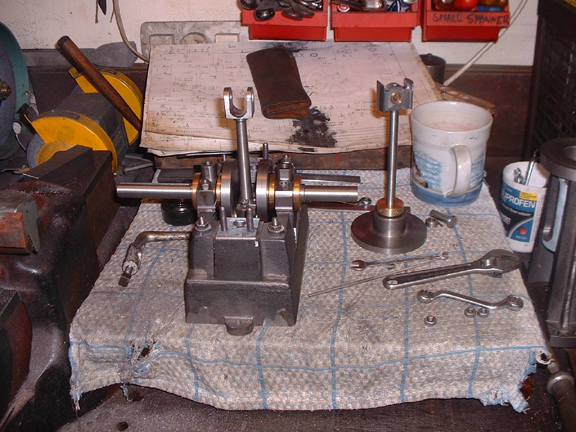
Posted - 23/09/2007 : 16:45
First job was to get a clean lathe, I hate muck after a job, I've no problem with it while I am on with the task but like to bottom it before I start anything else. One advantage about using neat cutting oil is that everything gets a coat of oil. A soldier should be like his rifle, clean, bright and slightly oiled.
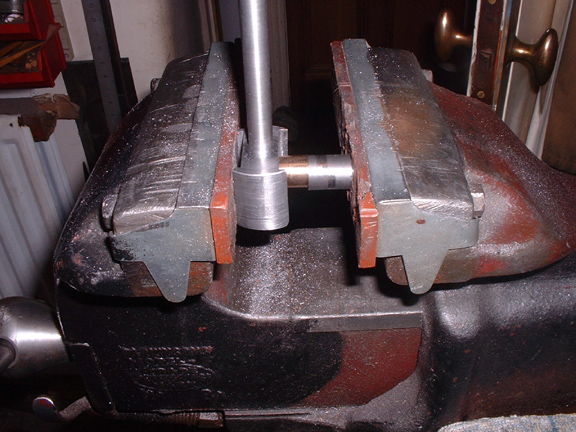
First job was to bore the ends for the bush (9/16") and then make a dummy bush with a flange that was the line I had to cut the ends in order to let the con rod swing, and then bore this 3/8" for a holding bolt for the next operation. I cut down the dides with a fine slitting saw on the H mill to get a good edge and then did a bit of sculpture.
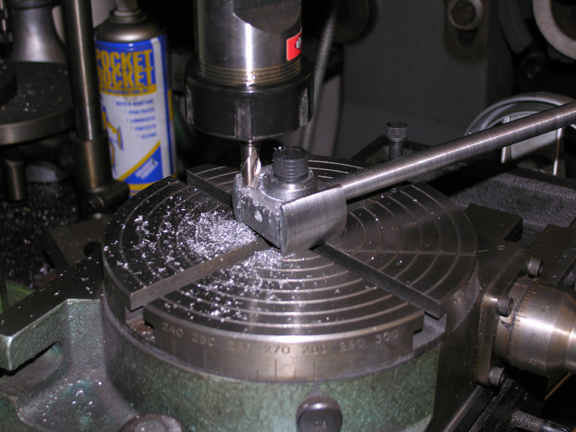
Get the rotary table out and a 5/16 slot drill and mill out the shape using the dummy as a template.
At close of play we have all the crossheads chopped out and tomorrow I'll make the bushes and press them in and then ease the fork ends of the con rods where necessary and fit them.
Stanley Challenger Graham
Barlick View
stanley at barnoldswick.freeserve.co.uk |
Stanley
Local Historian & Old Fart
36804 Posts
|
|
Posted - 24/09/2007 : 05:40
Looking forward to the day........
Stanley Challenger Graham
Barlick View
stanley at barnoldswick.freeserve.co.uk |
Stanley
Local Historian & Old Fart
36804 Posts
|
|
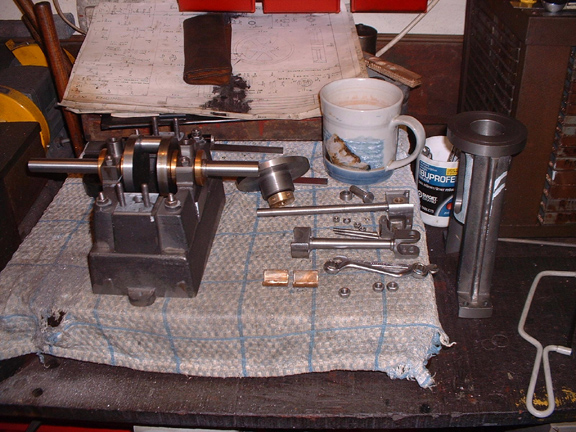
Posted - 24/09/2007 : 14:43
Started the day knocking tiddly little bushes out and pressing them home.
I got the crossheads bushed and fitted one set together but then remembered that this was the time to drill the oil holes. Stuart recommend 1/16" but I don't see the point in small oil holes, I drilled them all, crank and big end, 1/8".

By 12:30 I had all the con rods fitted to the crossheads and a nice fit they are too.... I took Jack for his walk and got soaked so I have decided this afternoon is quiet reading in the front room..... Tomorrow I'll make four gland nuts for the cylinder bottoms and then I'm ready for fitting the con rods to the journals.
Stanley Challenger Graham
Barlick View
stanley at barnoldswick.freeserve.co.uk |
Stanley
Local Historian & Old Fart
36804 Posts
|
|
Posted - 25/09/2007 : 18:38
I got diverted this morning by a book on the Black Acts which I ordered yesterday so it was afternoon before I got in the shed.
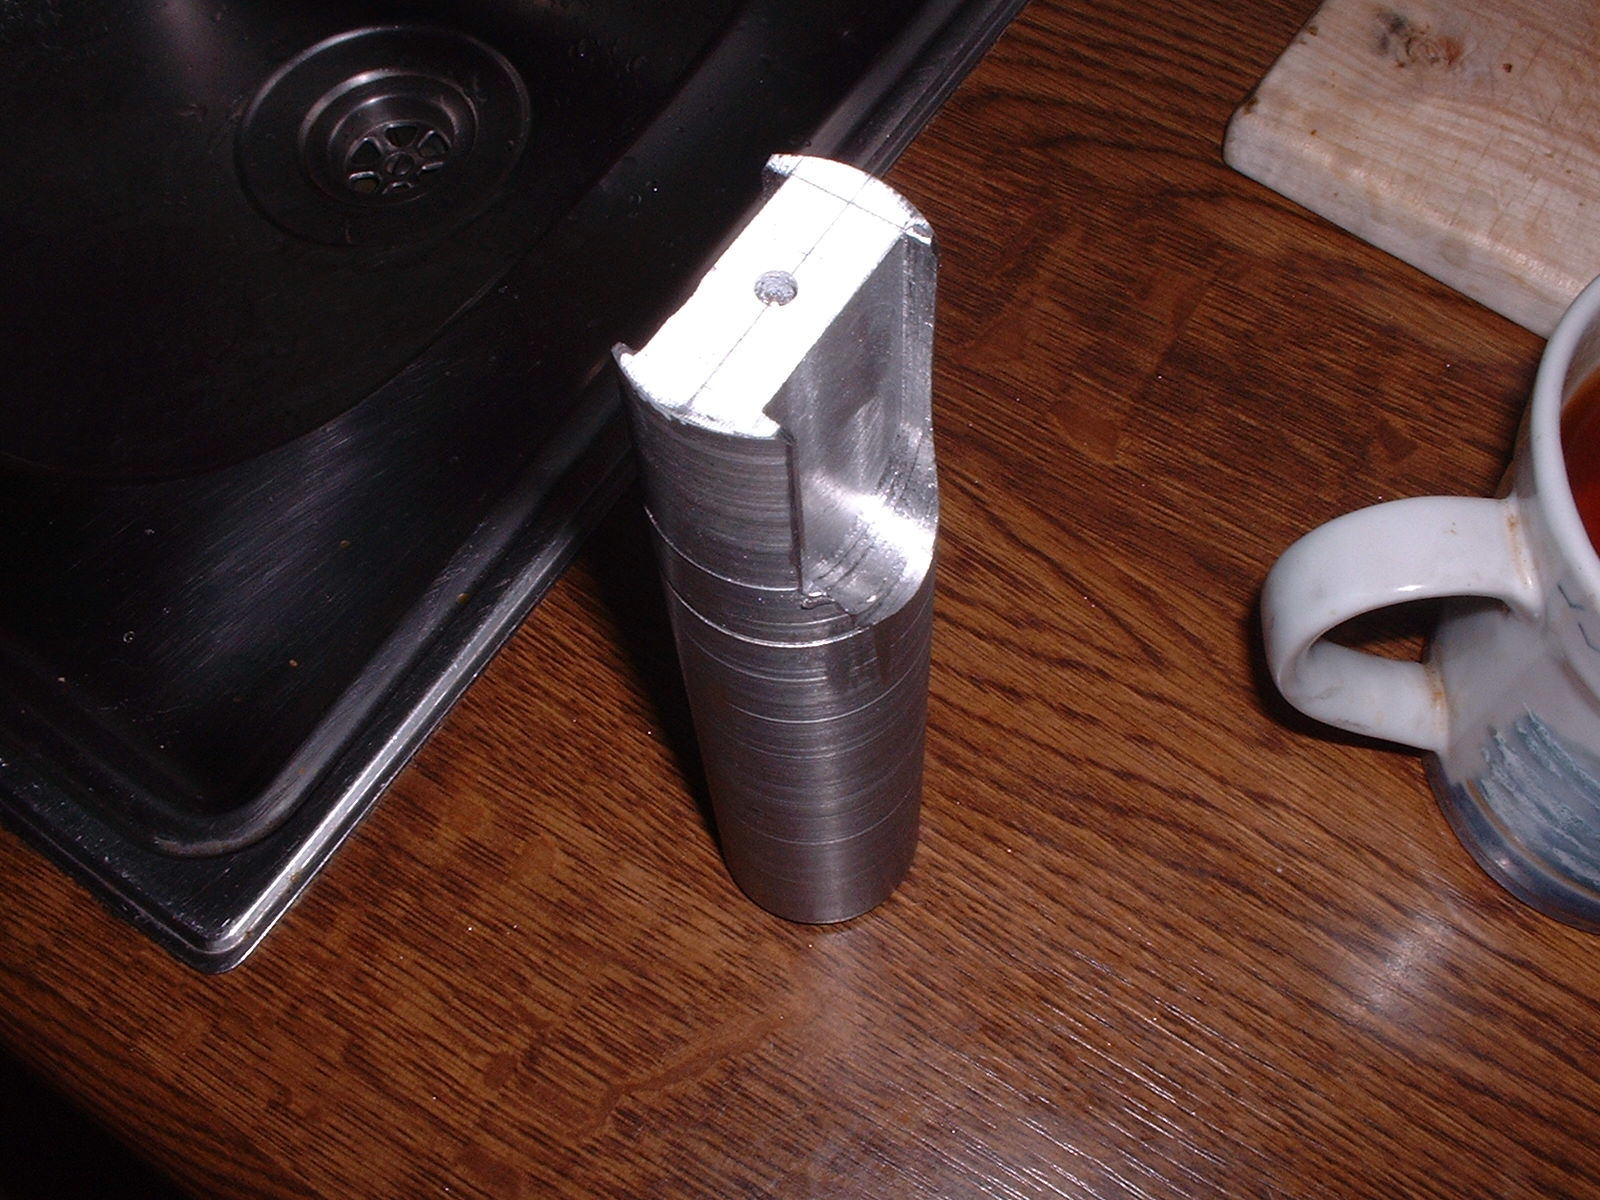
When I was getting non-ferocious castings made by Dick Bonser in Rochdale I used to get him to put big risers on the castings and buy them off him at scrap price. That way I got good cast stock for little money. Here's a nice brass riser getting the skin peeled off it.

Marvellous what's hidden under that crust!
A couple of hours later all the rods have a gland nut threded and ready for finishing with 5 1/8" holes on the circumfrence so they can be adjusted with a little tommy bar. I'll do that in Johnny's 1927 lathe tomorrow.....
Stanley Challenger Graham
Barlick View
stanley at barnoldswick.freeserve.co.uk |
Stanley
Local Historian & Old Fart
36804 Posts
|
|
Posted - 26/09/2007 : 16:20
The gland nuts for the valve rods are exactly the same as the ones for the piston rods except that they have a 1/4" hole instead of 27/64" so while I was in brass turning mode and set up I made those as well. Here they are, all finished and tommy bar holes bored. Enough for the day.....
Stanley Challenger Graham
Barlick View
stanley at barnoldswick.freeserve.co.uk |
Stanley
Local Historian & Old Fart
36804 Posts
|
|
Posted - 27/09/2007 : 16:03
Can't put it off any longer, we had to get down to serious engine fitting today. Before I could get to this stage there were a few housekeeping jobs to do. The individual con-rods are matched to the engines and the crosshead/piston rods are matched to each con rod. The con rods still have their numbers but the piston rods lost theirs when I was shaping the ends so the first thing to do was give then all matching numbers stamped near the oil hole. At the same time I put matching pop marks on the collars and crank pins so that the holes for the taper pins could be lined up easily. These marks will follow the engine for life and just as in full size practice, fitters in the furure can be sure they are matching parts up correctly. Only a small thing but fitting marks as they are called can save a lot of time and mistakes. Next job was to take one engine and get the standard off it. Take the marine end to bits and split the bearing with a junior hacksaw with a new blade in it. Then fit the shells to the crank journals making sure they had side clearance. The good new is that the existing bore of the piece of bushing I was using is exactly right for the journals, mugs for luck! No too tight, just a little bit of play, well within limits. I fitted the con rod and tightened the holding bolts and it was just right apart from one thing.....
The ends of the bolts on the marine end foul the bed plate. This wasn't unexpected as I had the same problem with the engine I made a long time ago but I thought I'd leave it until I knew exactly what the problem was.
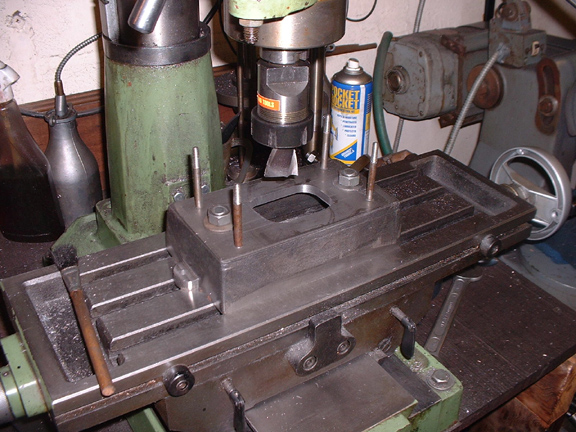
A quick visit to the V miller and a nice tidy hole milled in the bed plate to give plenty of clearance. Next job was to drill and tap the oil holes for the lubricators which go onto the top of the standard and lubricate the crosshead slide. At this point I lost my presence of mind and did something entirely out of character.....
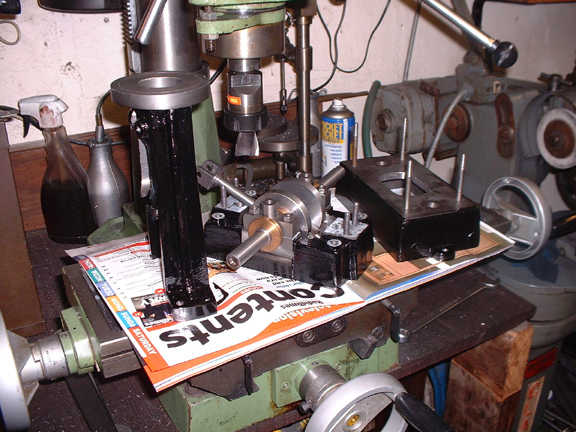
I got the paint out and gave the castings a coat of black paint. I apologise for this but it was the best time to do it while they are split apart. I played with the idea of making the lubricators for the standard but decided to let that hang until I had all the engines fitted up at the bottom end. So I just polished the piston rod and made sure it was a good sliding fit in the cylinder base with the gland nut fitted. The centres were a fraction out but a minimal wipe with a round file has cured that. Everything is ready for fitting up tomorrow when the paint has dried. I shall treat all the others the same and now I've got the process sorted out I should be able to do an engine a day for the next three days. I'm quite looking forward to how they'll look with the bottom ends knitted together.
Stanley Challenger Graham
Barlick View
stanley at barnoldswick.freeserve.co.uk |


